colour cycling script (current version here, for older versions see posts below):

few words how this works:
- when we think about colour cycling, we usually think about palette shifting. it is reasonable, however it seemed to me as easier option to shift pixel index values instead of shifting around palette entries. so that’s what i did. this script checks each pixel in cel for matches in entered list of indexes and switches them for the next entry in the list. it is as simple as it gets, but it works ;]
- i didn’t come across any issues while using this script, but you know, just to be sure: always save before using (well, any) scripts.
enjoy and feel free to improve
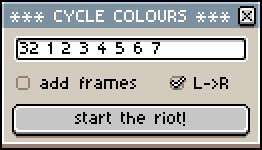
v0.05 update: script now has “left to right” option to reverse the order of input list.
this is selected by default, which reverses the behaviour of previous versions. you probably want to leave this on, however if you prefer previous behaviour, change the line selected = true to selected = false under id = “reverse”.
to explain little bit more: in the beginning i was confused to find out that script gives results in opposite direction from what i expected. in my westerner’s left-to-right mind, when i enter 1 2 3, the colour cycling should go like this: 1 2 3, 3 1 2, 2 3 1 etc. right? well, wrong. because table (array) is also ordered from left to right, the script will look for first value (1) and then replace it with the next value (2) and so on, so the result is: 1 2 3, 2 3 1, 3 1 2 etc.
with left to right option the results are - hopefully - more in line of one would expect.
left to right OFF (normal order):
X 1 2 3 —> 1 2 3 X —> 2 3 X 1 —> 3 X 1 2
left to right ON (reversed order):
X 1 2 3 —> 3 X 1 2 —> 2 3 X 1 —> 1 2 3 X
-- COLOUR CYCLE 0.05
-- b236
--
-- *** scanline colour cycling effect ***
--
-- 1) IMPORTANT: set sprite to indexed
-- 2) select cel
-- 3) run script
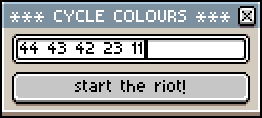
-- 4) enter colour indexes you want to use
-- for example: 42 23 11
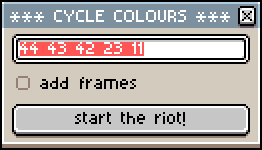
-- 5) select or deselect option "add frames"
-- 6) select or deselect left to right option ("L->R")
-- 6) click on button
--
-- ADD FRAMES OPTION:
-- if the option is selected then:
-- the script will duplicate current frame n-1 times,
-- with n being the length of your list (in our example n=3)
-- if not:
-- the script will duplicate only current cel n-1 times
-- in both cases it will cycle through the colours
-- changing selected pixel indexes on each step
--
-- LEFT TO RIGHT OPTION:
-- if selected:
-- the script will reverse order of indexes, which
-- will result in animation going 'from left to right'
-- if deselected:
-- the script will act as in previous versions, which
-- will result in animation going 'from right to left'
--
-- IMPORTANT: don't repeat numbers.
-- unless it's exactly what you want to do.
-- if you want to have a "wave" effect,
-- instead of entering a sequence 11 23 42 23 11
-- duplicate colours 23 and 11 in your palette
-- as new entries and use their indexes
-- like this:
-- 44 (duplicate of 11) 43 (duplicate of 23) 42 23 11
--
-- IMPORTANT: for adding cels you need enough empty frames
-- in timeline.
--
-- IMPORTANT: don't use on layer which already contains animation!
-- it will be overwritten!
--
local dlgWin = Dialog{ title = "*** CYCLE COLOURS *** " }
local temp = {}
local clrs = {}
local steps = 0
-- set dialog window
dlgWin
:entry{
id = "clrs_input"
}
:check{
id = "add_frames",
text = "add frames",
selected = false
}
:check{
id = "reverse",
text = "L->R",
selected = true
}
:button{
text = "start the riot!",
onclick = function()
fInput(dlgWin)
end
}
-- show dialog window
dlgWin:show{ wait = false }
function fInput(dlgWin)
img = app.activeCel
img_h = img.image.height
img_w = img.image.width
aS = app.activeSprite
aL = app.activeLayer
aF = app.activeFrame.frameNumber
aI = img.image
aP = img.position
sF = aS.frames
frames = #sF - aF
-- wrap function in transaction,
-- so only one history step is generated
app.transaction( function()
-- convert input entry to string
clr_list = tostring(dlgWin.data.clrs_input)
-- search string for digits, convert them to numbers and insert them into temporary table
for i in string.gmatch( clr_list, "%d+") do
table.insert(temp, tonumber(i))
end
if dlgWin.data.reverse == true then
--- reverse temporary table and feed clrs table
for j = #temp, 1, -1 do
table.insert(clrs, temp[j])
end
else
--- just feed clrs table
for k = 1, #temp, 1 do
table.insert(clrs, temp[k])
end
end
-- get table length
steps = #clrs
-- duplicate cels
for v = 1, steps-1, 1 do
-- if add frames is selected:
if dlgWin.data.add_frames == true then
app.command.NewFrame()
img = app.activeCel
-- start the riot
fMain()
-- if add frames is NOT selected:
elseif dlgWin.data.add_frames == false then
-- check if there are enough empty cels:
if frames > 0 and frames >= steps-1 then
aI = img.image
aS:newCel(aL, aF+v, aI, aP)
img = aL:cel(aF+v)
-- start the riot
fMain()
else
-- if not, do nothing
app.alert("not enough empty cels!")
break
end
-- this nasty block is here
-- to help aseprite to refresh :P
app.command.GotoNextFrame()
app.command.GotoPreviousFrame()
-- app.refresh() doesn't update timeline
end
end
end)
-- clear colour table for next use
fClear()
-- close dialog window
--dlgWin:close()
end
function fMain()
--img = app.activeCel
-- scan through all pixels in selected cel
for yy = 0, img_h-1, 1 do
for xx = 0, img_w-1, 1 do
-- get pixel value
clr_i = img.image:getPixel(xx,yy);
-- do the magic trick
fCycle(xx,yy,clr_i)
end
end
end
function fCycle(xx,yy,clr_i)
-- check if colour index of pixel is in the list
for i, value in pairs(clrs) do
if value == clr_i then
if i < steps then
-- replace the colour with new value
img.image:putPixel(xx,yy, clrs[i+1])
elseif i == steps then
-- if the colour is last in the list
-- replace it with the first one
img.image:putPixel(xx,yy, clrs[1])
end
end
end
end
function fClear()
for i in pairs(clrs) do
temp[i] = nil
clrs[i] = nil
end
clr_list = nil
end
below is little bonus, if you like clicking the mouse.
what this does is that anytime you click on “get the colour” it will read foreground colour index and add it to the list. you can then copy this list and use it to feed colour cycling script. useful? err… maybe? anyway, here you go:
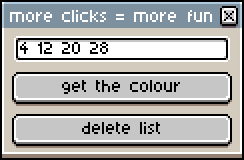
local dlgWin = Dialog{ title = "more clicks = more fun  " }

list = {}
counter = 1

function fGet( dlgWin )

	table.insert(list, math.floor(app.fgColor.index) )

	local dlgDat = dlgWin.data
	dlgDat.output = table.concat(list, " ")

	dlgWin.data = dlgDat

end

function fDel( dlgWin )

	local dlgDat = dlgWin.data

	for i in pairs(list) do
		list[i] = nil
    end

	dlgDat.output = ""

	dlgWin.data = dlgDat

end

-- set dialog window
dlgWin
	:entry{
		id = "output",
		--value = list
	}

	:button{
		text = "get the colour",
		onclick = function()
			fGet(dlgWin)
		end
	}

	:newrow()

	:button{
		text = "delete list",
		onclick = function()
			fDel(dlgWin)
		end
	}

-- show dialog window
dlgWin:show{ wait = false }