Hi, I’ve had Aseprite for about 5 months and it’s the best art program I’ve ever used. Recently, I started to work on a short film with my friends, and I’m making all the animations in Aseprite. Since the editing software we’re using does not support GIF files, we are going to have to do GIF to video file conversions online and all that stuff, so I suggest there should be way to export in certain video files (mp4, AVI, webm, etc.) I’m very new to this community site so I’m sorry if there’s already a post similar to this. have a good day 
2 Likes
If you are editing your film in some video editing software, they most often support .png files, and the best way to export for video editing is as .png regardless because of the color limitations of .gif, and possible quality loss due to re-encoding a video file.
Generally all you need to do is file → export, then make sure “Frames:” is set to “All frames”, then export as .png and it will spit out the entire animation as a series of .png files. Then try to drag and drop those into the program you are working in.
2 Likes
Hi I was wondering about this too… only question I have is what about if I’ve spent a while editing the Individual frame durations in Asesprite? Is there a way to preserve those? Or just input them again into the video editor instead?
You’d have to put them into the editor.
You could export a spritesheet of your animation and that can also produce a JSON file with all the tags and frame durations, and if your video editor supports scripting, you could use that to set the durations automatically. Sadly I doubt you can easily just feed the spritesheet into the video editor, you’d still need to export individual PNGs.
Edit: I wonder why Aseprite doesn’t have an option to put the duration in the filename, that would make automating this sort of thing so much easier >:
adding to what eishiya said:
to make it worst i don’t think there are editors which support import of gif files with different frame lenghts, but i might be wrong.
personally i would split longer frames into multiple frames to keep the timing. but you’d need to use script to do it automatically.
of course, if your frame lenghts are incompatible with standard video frame rates and all over the place, then you are in trouble either way. 
Hello,
for exporting as a png sequence, my friend’s editing software supported that, when we were doing a project together, so that was okay. But now I am working on a project by myself, and my editing software doesn’t support png sequences, and the animations are 60+ frames so it would take a long time to add them by hand. Another thing that you probably know is the .gif quality and colours are terrible. If you have any tips, they would be appreciated.
You could use the free command line video encoder ffmpeg (https://www.ffmpeg.org/). That will take png sequences and encode them into just about any video standard you could think of.
The basic command you’d need to make an mp4 would be:
ffmpeg -i img%03d.png -c:v libx264 -vf fps=25 -pix_fmt yuv420p out.mp4
Where your sequence of PNG files would be named ‘img001.png’, ‘img002.png’ etc
And the output would be a x264 encoded 25 fps mp4 file called out.mp4
Edit: Aseprite doesn’t pad frame numbers with zeros so you don’t need the ‘03’ in the input file name, just the ‘%d’ part.
3 Likes
Hi,
I went to the website you provided, but I can’t seem to find a download link that’s an app file. If you could send a direct download link, I’d appreciate it. Thanks
There are Linux, Windows, and MacOS executables on the download page, just below the source downloads. They link to other pages where you can get the binaries for your specific OS.
Keep in mind that ffmpeg is a command line tool. If you’re looking for a GUI, you’ll need to find something else. There are a number of GUI programs built on top of ffmpeg that you can find by looking up “ffmpeg gui” online. However, the command line version is faster to work with once you know what you need, and it’s easy to save the basic commands you use most often (such as the example above).
hello,
so i think this ffmpeg “command line tool” might be a little too complicated for my current skill base with this kind of thing lol. do you know another png sequence to any video file that are a little more simpler to work with? lol sorry, i’m just not that good at this kind of thing
I haven’t used anything that I would say is simpler.
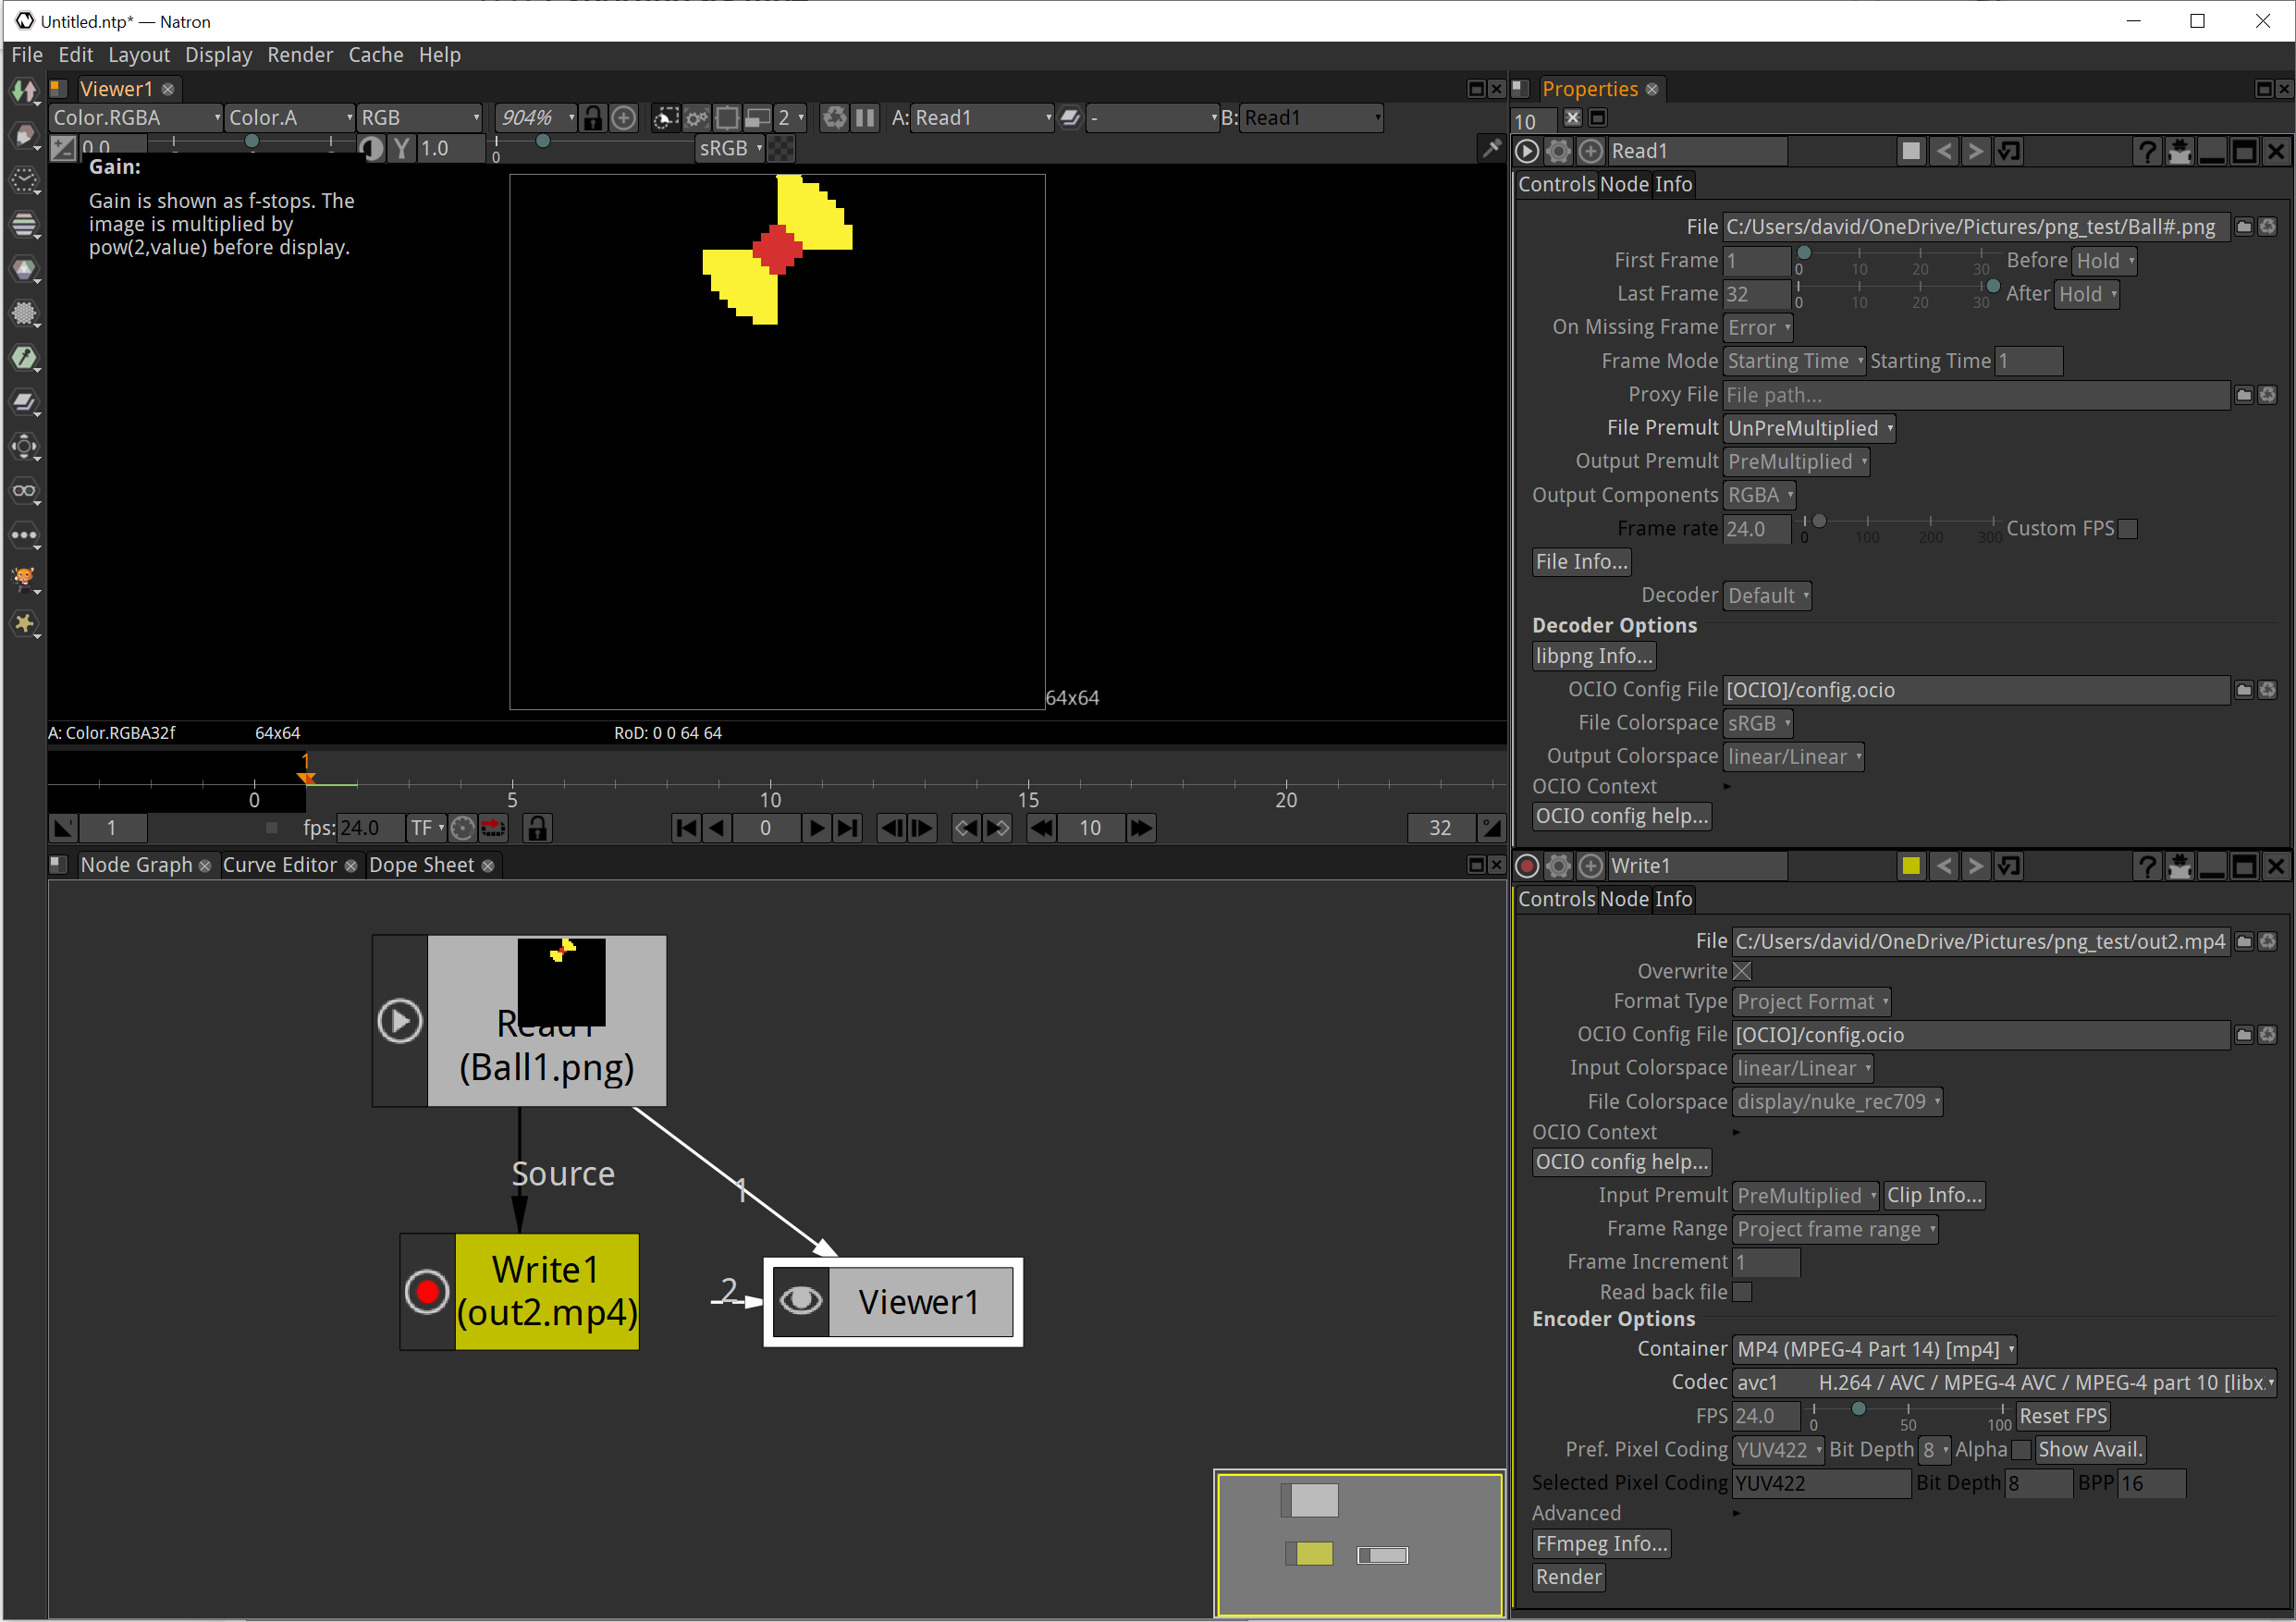
I have used the free video compositing application Natron, which can can do it (https://natrongithub.github.io/). But I wouldn’t say that’s simpler.
It has a node/graph based user interface. So you’d set up an Image:Read node and an Image:Write node, drag and drop a link between the two. Then in the main menu select Render->Render All Writers, and it should process the video.
Maybe a more immature solution could be using a screen recorder?
I had the same issue, and I couldn’t find any satisfactory solutions on the internet. I did however write a Python code to solve this issue for me!
Here is the code if anyone might need it:
Python Code
import re
import os
import imageio.v2 as imageio
#NOTE: You could get an ImageIo warning if the dimensions aren’t divisible by 16,
#it could hamper the mp4 resolution, but the output is still achievable
#NOTE: Use / in path NOT
png_dir = ‘C:/Path/To/Images/Directory’
mp4_file = ‘C:/Path/To/Output/Directory/Name.mp4’
#Create list of png files in directory, sorted by filename
png_files = sorted([os.path.join(png_dir, f) for f in os.listdir(png_dir) if f.endswith(‘.png’)], key=lambda x: int(re.findall(r’\d+', x)[-1]))
print(png_files)
#Create writer object for mp4 video
writer = imageio.get_writer(mp4_file, fps=10, codec=‘mpeg4’, bitrate=‘5000k’)
#Write each png file to video
for png_file in png_files:
image = imageio.imread(png_file)
writer.append_data(image)
#Close writer object
writer.close()
print(“Done”)
how would one use this (sorry to revive the topic)