VCam or Virtual Camera is my next tool for Aseprite in which I collaborated with the very talented Squidly! It helps with large scene animations and the idea of being able to focus the movable camera view on the action over the course of the animation.
Download Link: VCam by CarbsCode
Short Announcement Video: https://youtu.be/rtsoKhJbeLg
Full Overview Video: https://youtu.be/4ugs4NGnM1I
Inspired by tools such as VCam for flash where you can define a camera view and move it around the scene. The idea being that you could animate your full scene and then move the camera view to the action instead of vise versa.
This tool was requested and created in collaboration with the very talented Squuuidly who was looking to reduce the repetitiveness from his complex animations. Be sure to check out his live streams as well as his newgrounds pages! I also hear he’s also working on a really awesome game too so be sure to wishlist on steam!
Examples By Squuuidly:
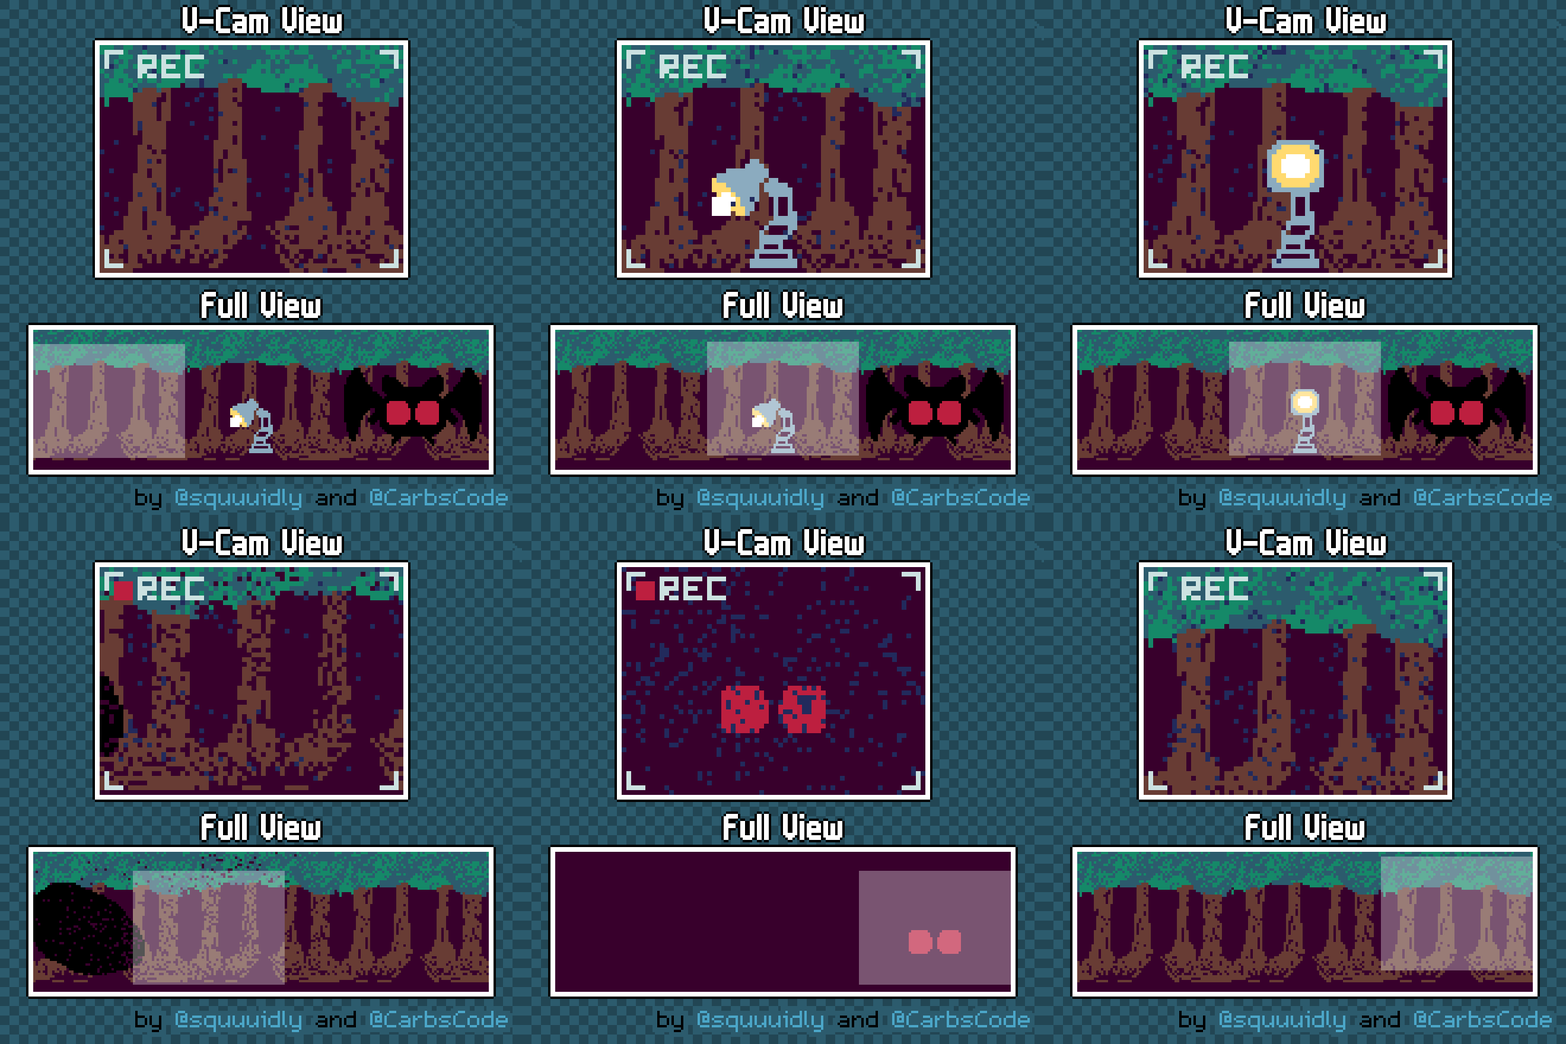
Mothman Finds A Lamp
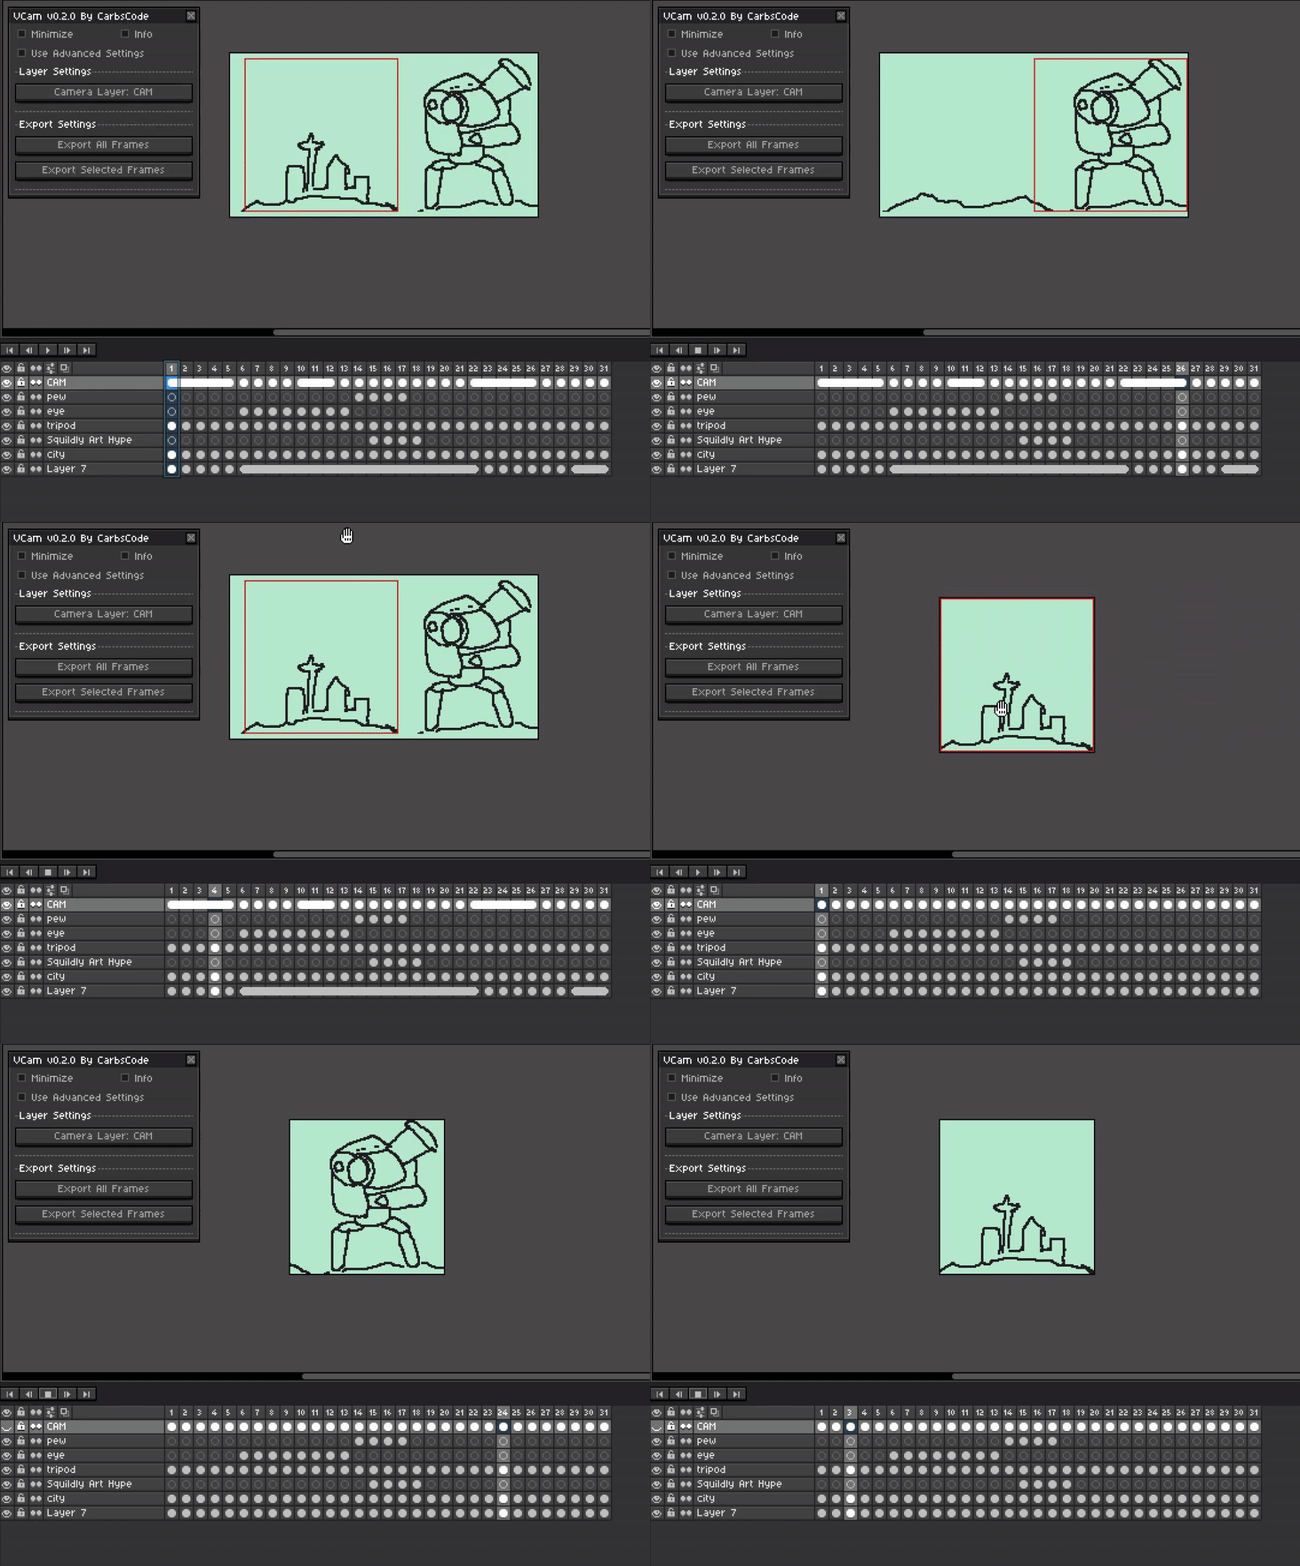
Camcorder Of The Worlds
Getting Started With VCam:
Installing:
- Installing and updating can be done by simply double clicking or dragging and dropping the extension file in to Aseprite.
- This will put all the files where they need to go automatically.
- You can also enable and disable the extension as well from the settings menu in Edit>Preferences>Extensions if needed.
- Once installed you will find “VCam…” under the Frame menu above.
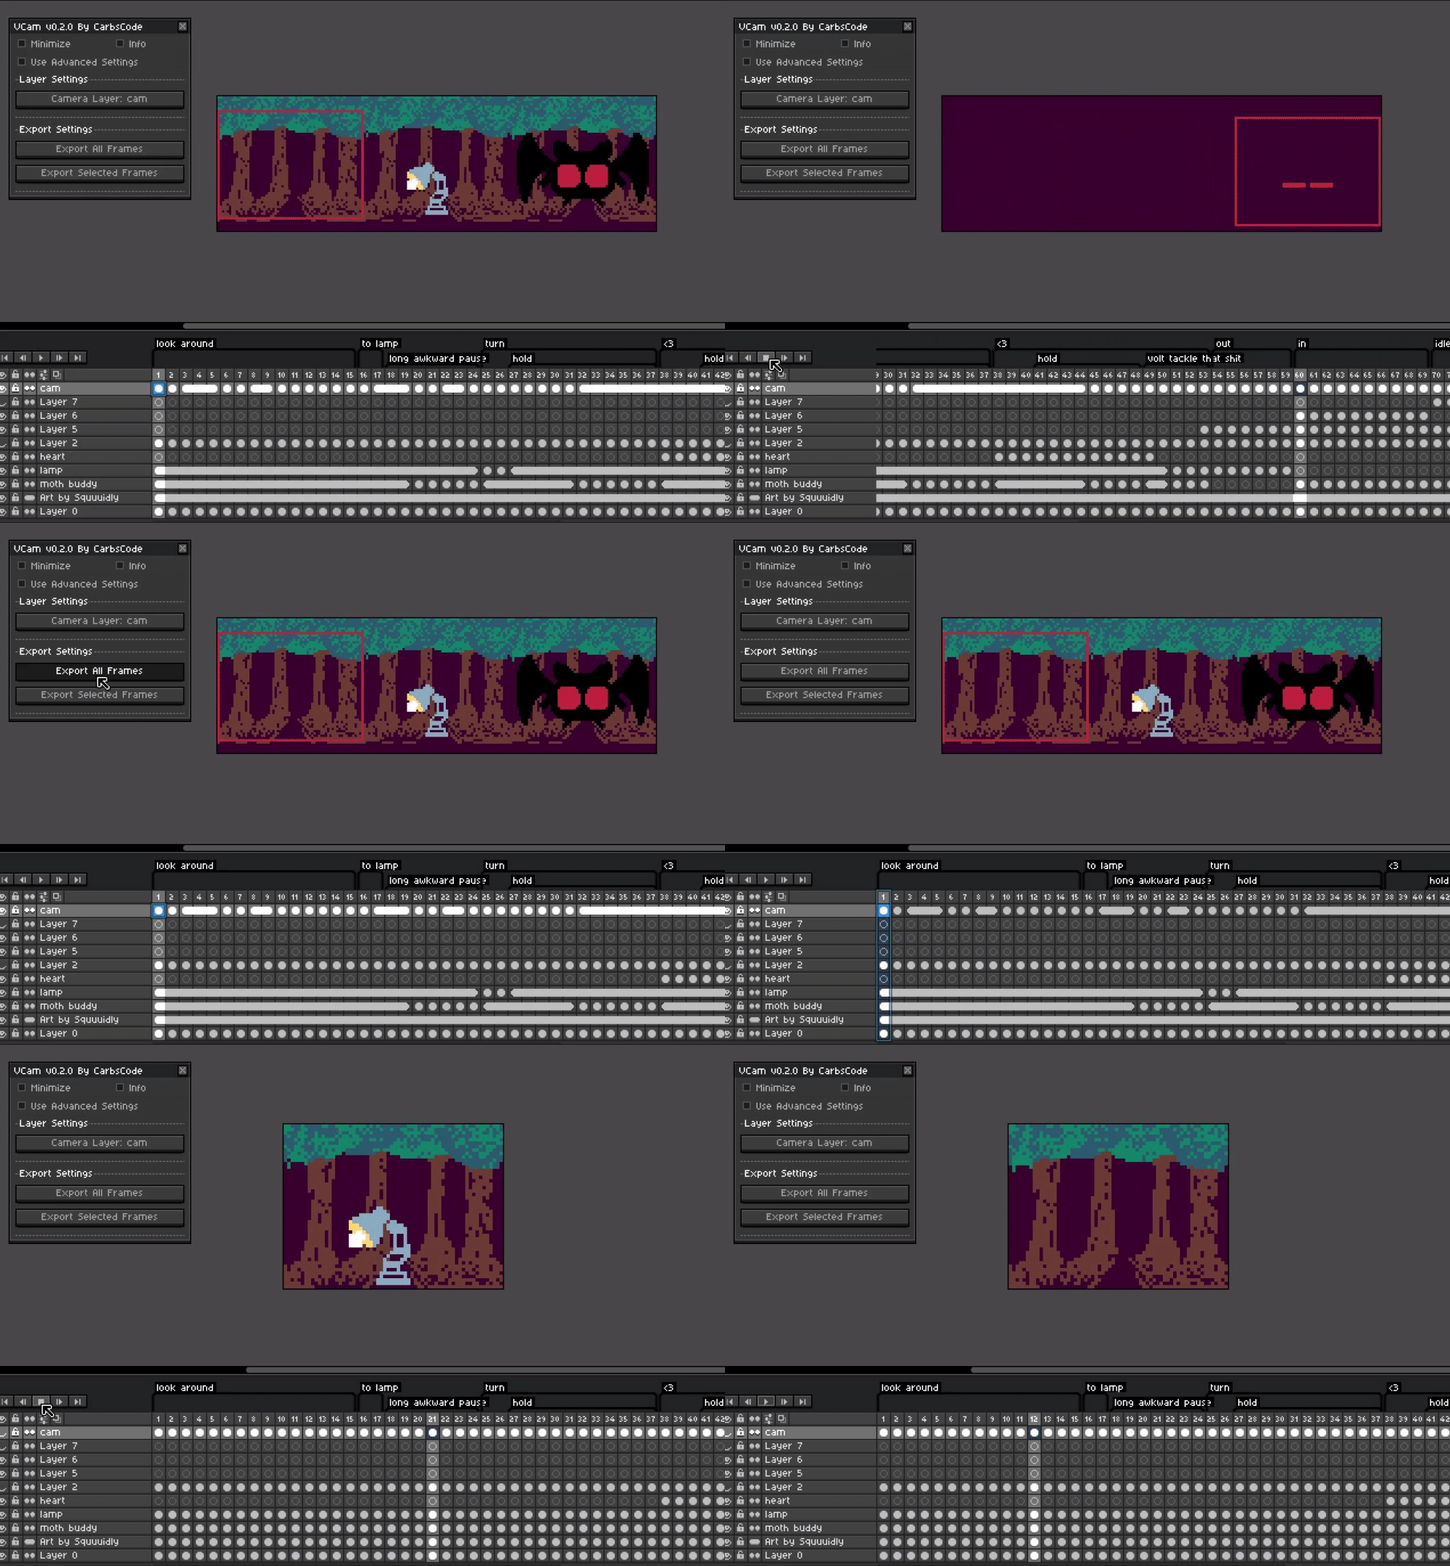
- Start by creating a new layer and draw a 1 pixel wide rectangle for where you would like the view to be. Inside this camera rectangle is what the camera will see in each frame when exported.
- Copy the camera rectangle and reposition on each of the frames you will be exporting.
- Select your camera layer and press [Camera Layer: None] button to set your current camera layer.
- Press Export All Frames Or Select a range of frames and click Export Selected Frames.
Main Features:
Export All Frames Using Camera Rectangle
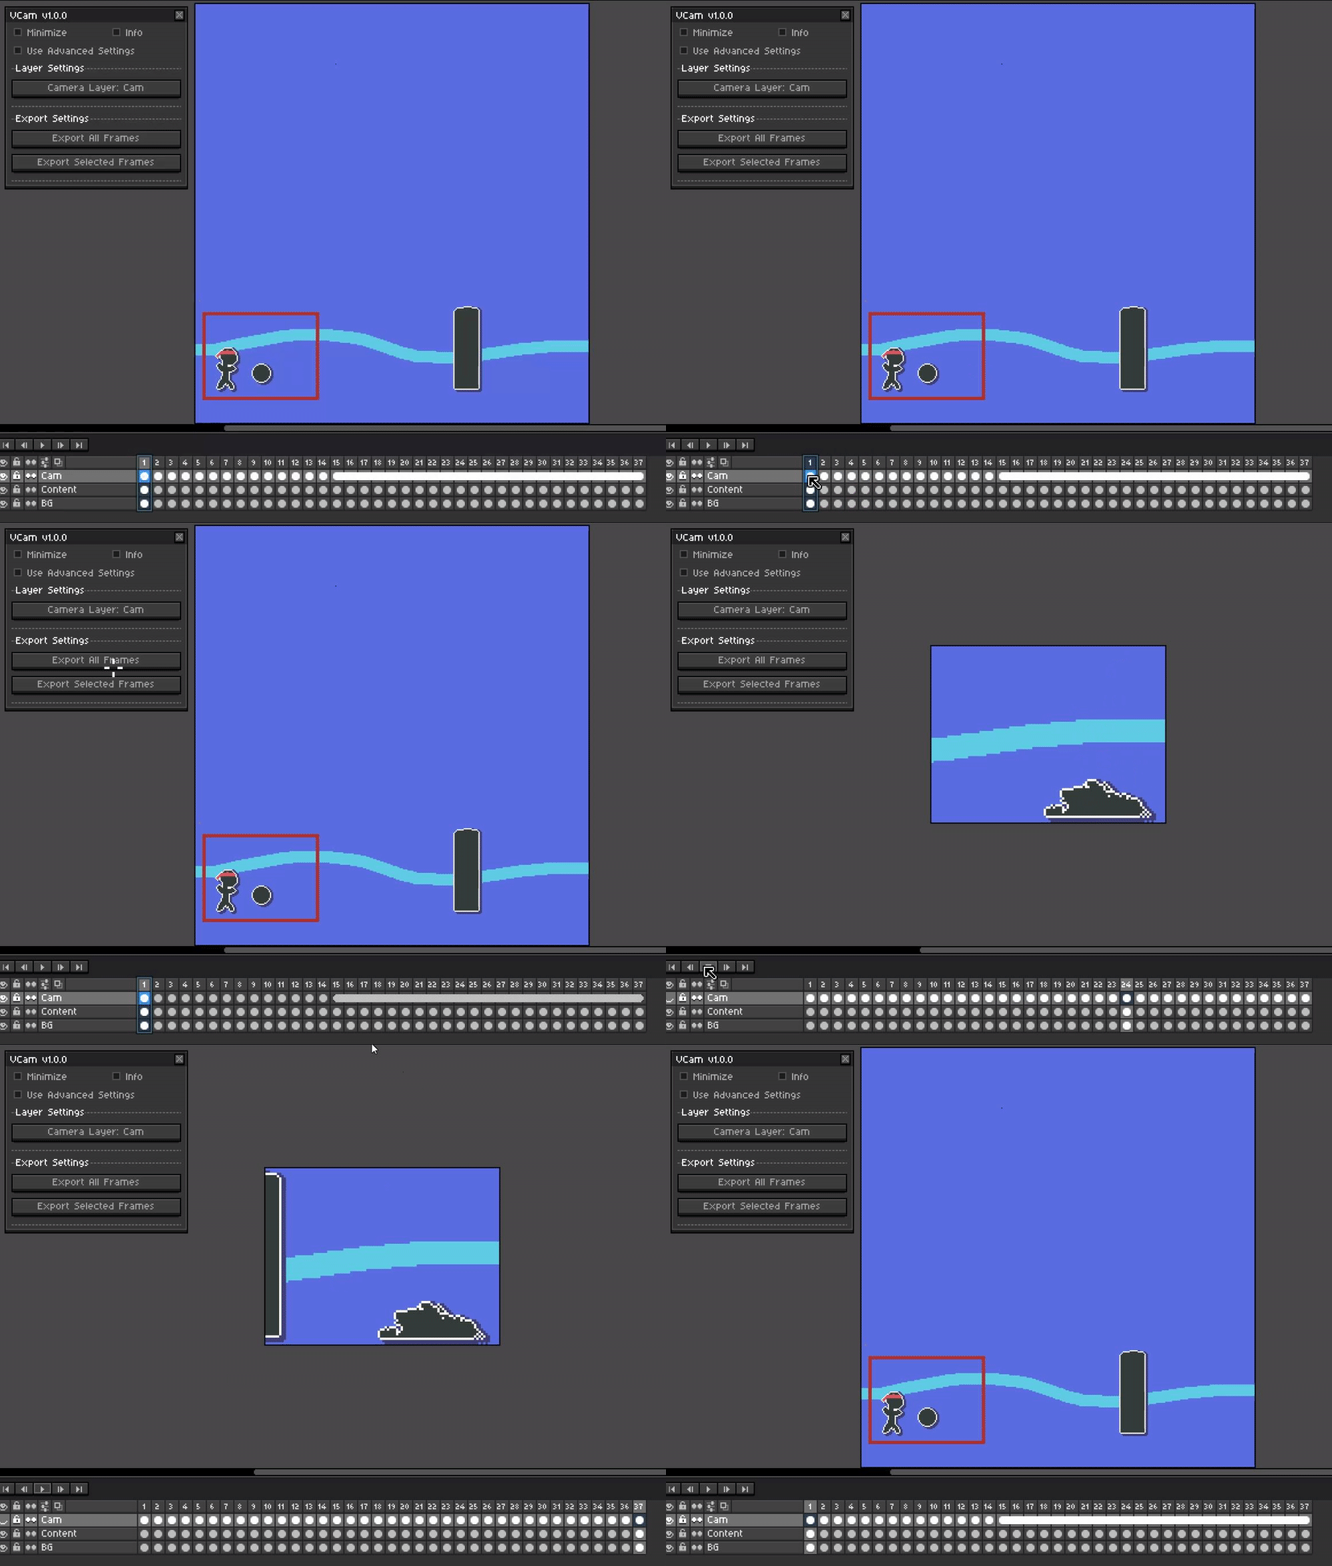
All frames will be exported, layers and tags will be kept intact as they were in the original file. Any content inside your 1 px camera rectangle will be in viewed in the newly exported file that is opened.
Export Selected Frames Using Camera Rectangle
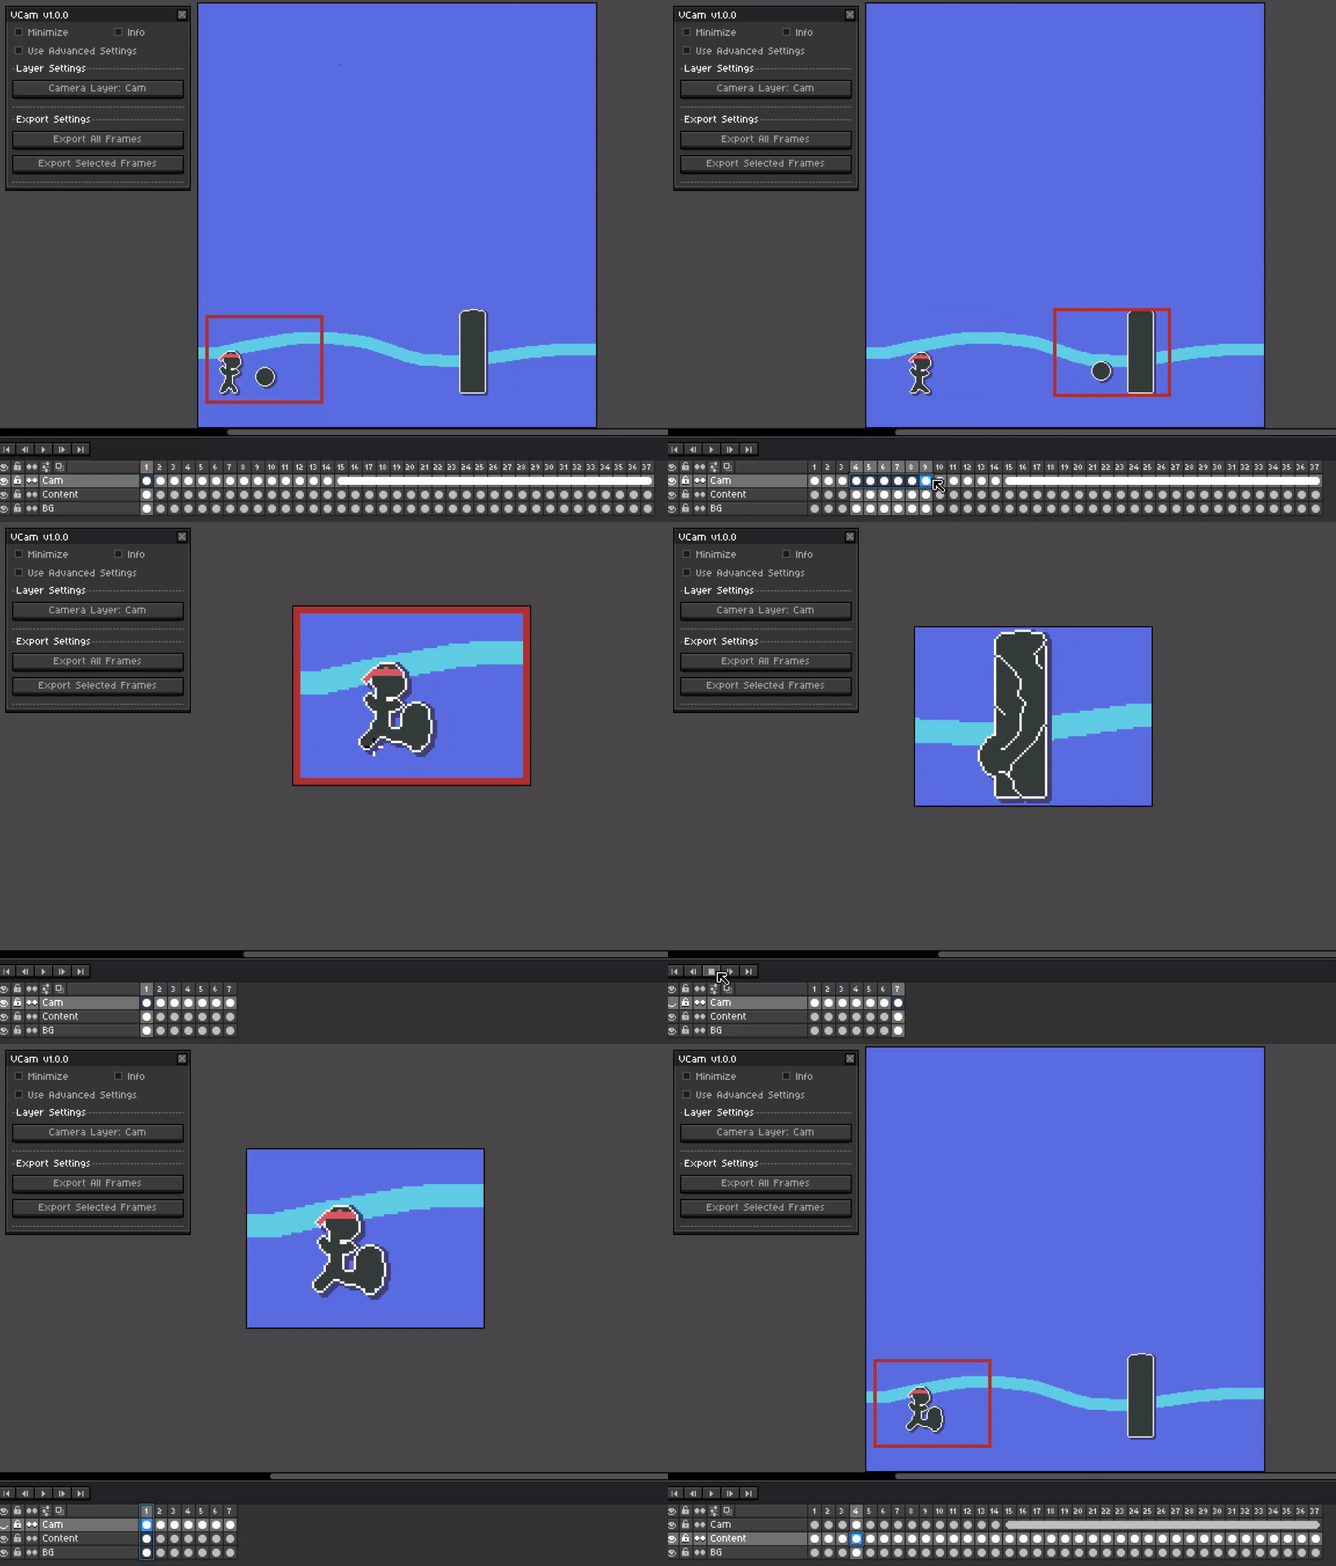
Only the selected Frames will be exported along with overlapping tags, again using your 1px camera rectangle.
Create New Camera Layer Automatically
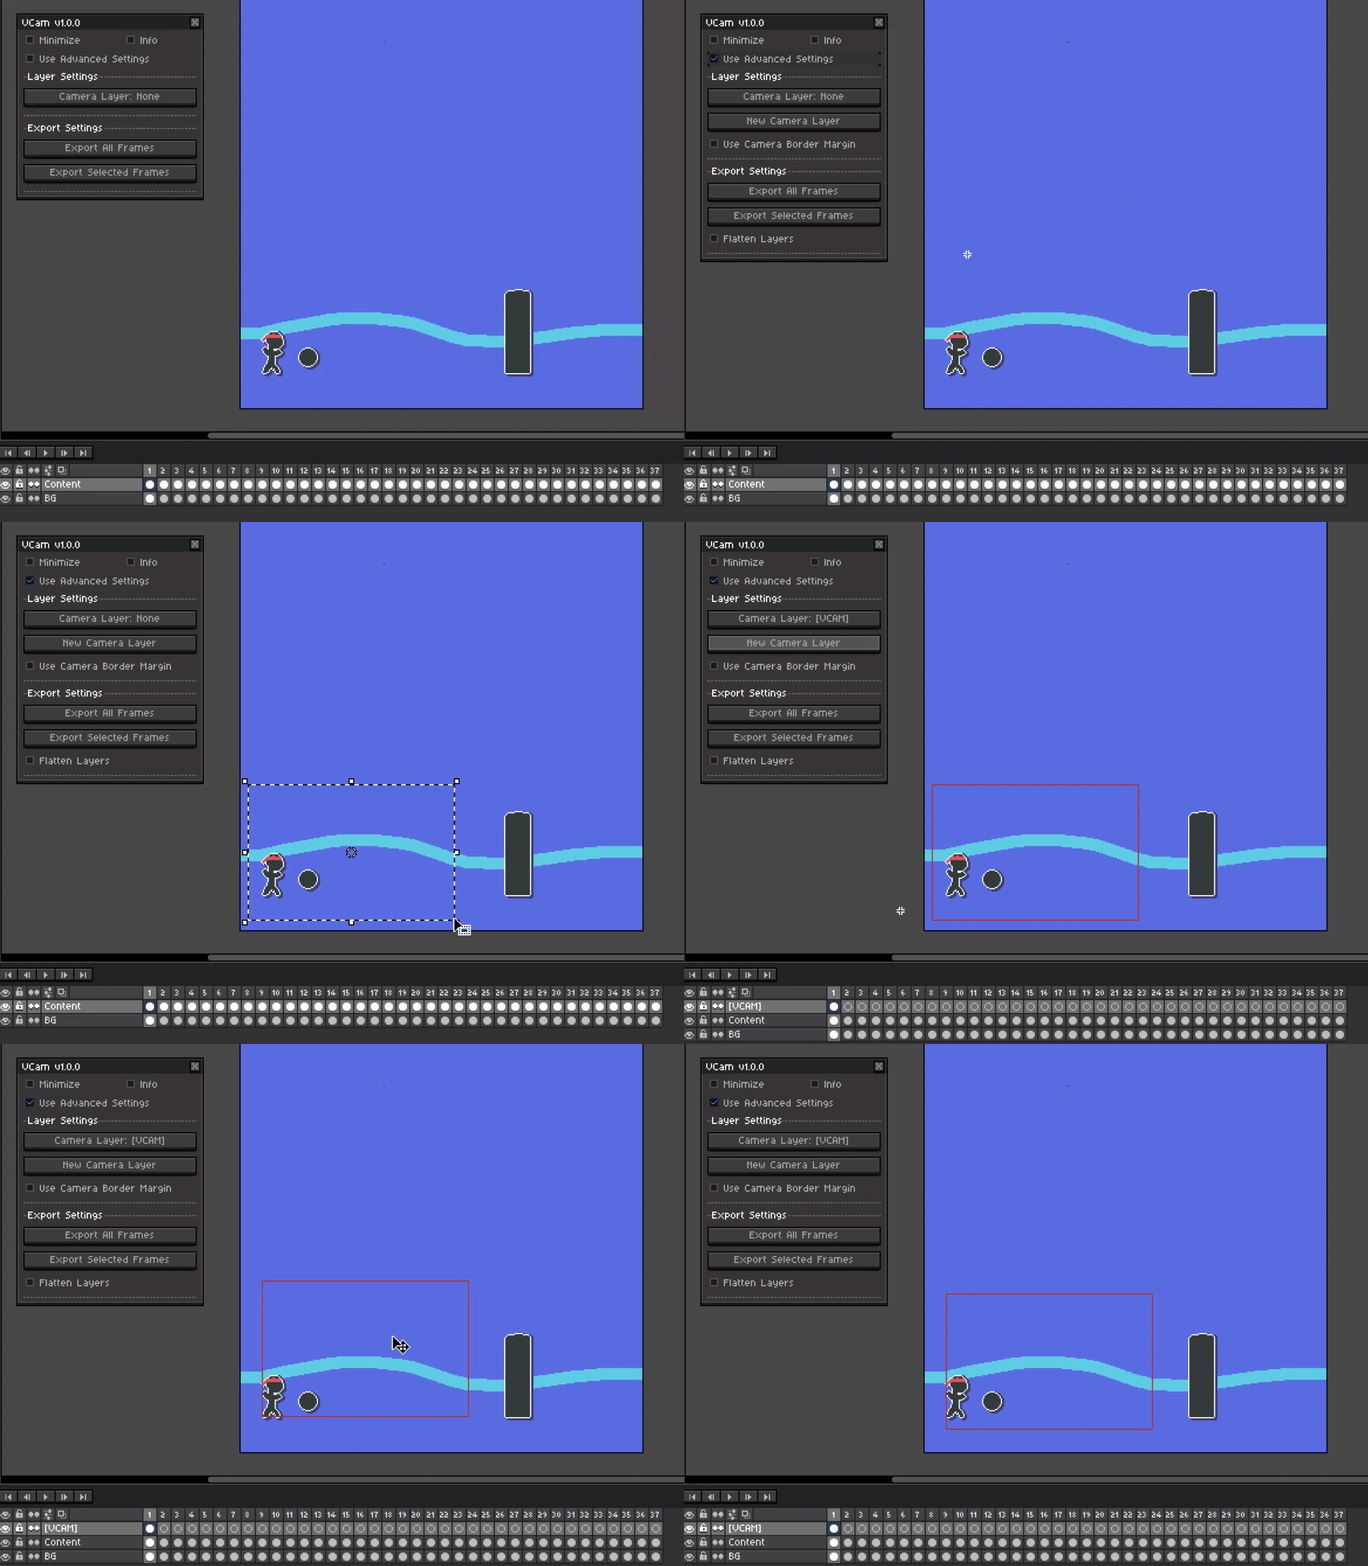
There is an option to create a camera rectangle from your current marquee selection. This will also create a new layer and even set the current camera all in one button press.
Camera Border Margin
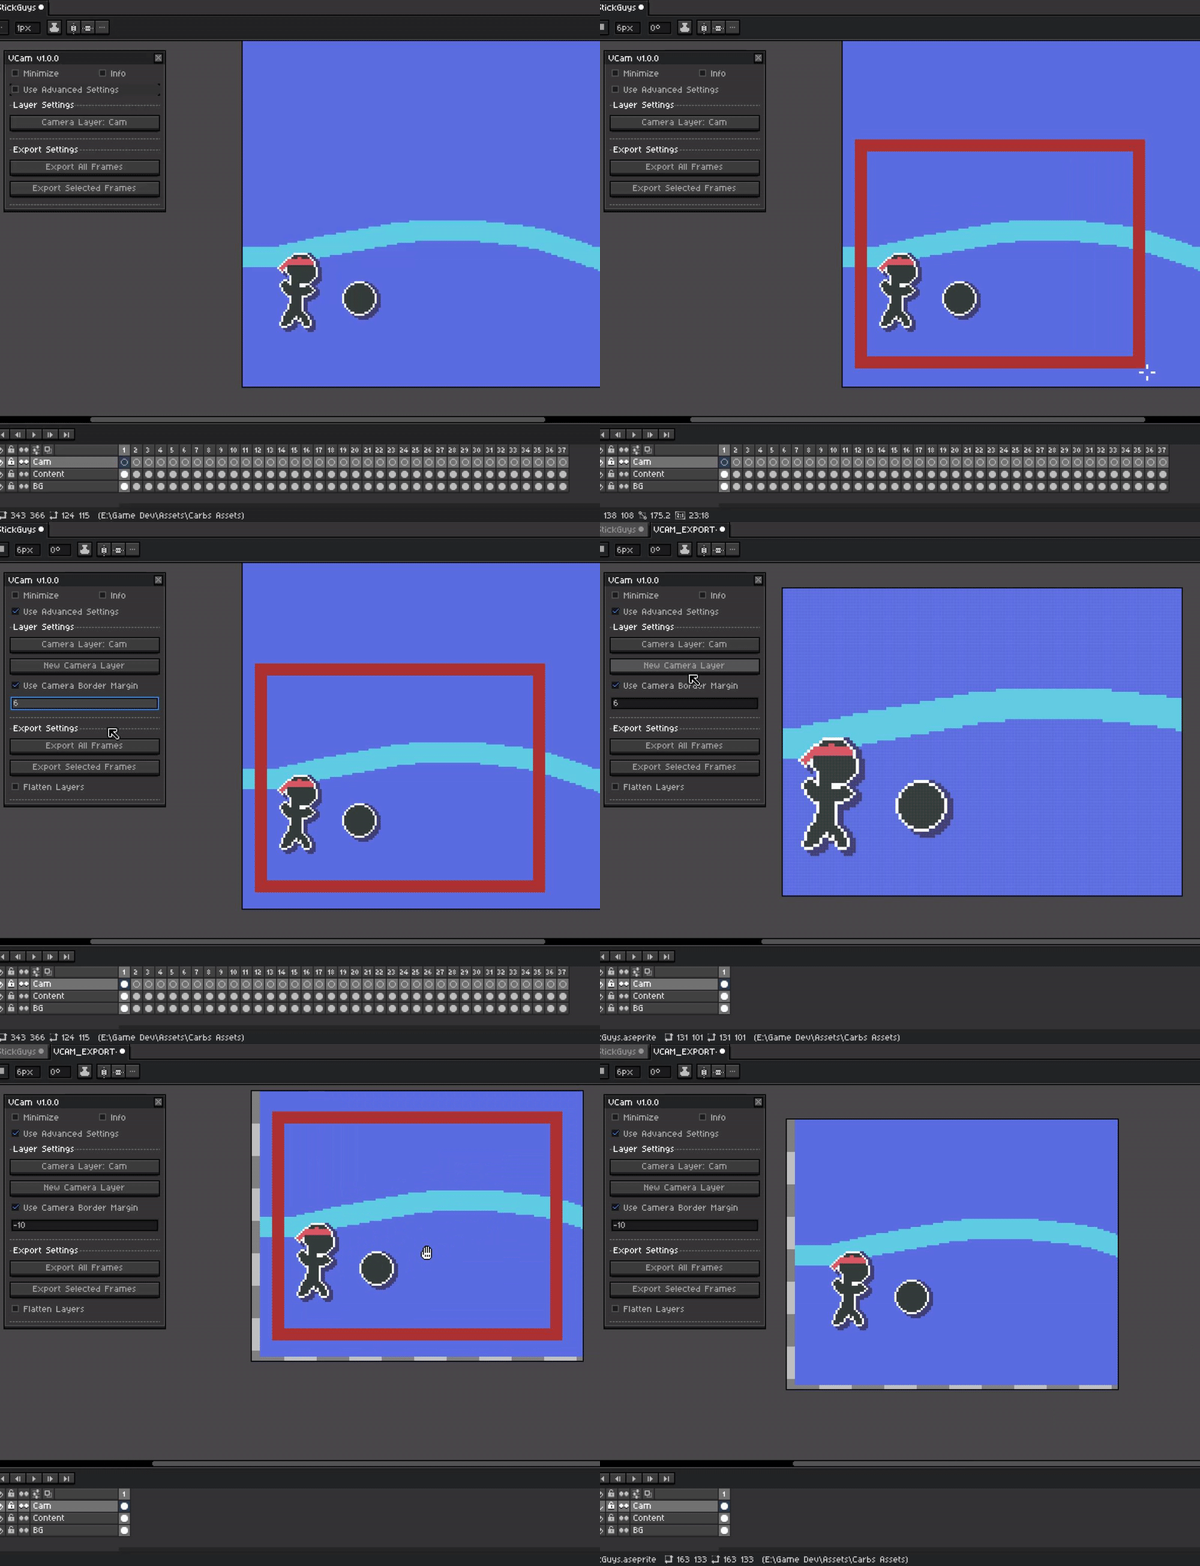
If your camera rectangle has a thickness greater then 1 px the camera margin border can be adjusted using Use Camera Border Margin toggle. This value can also be negative if you would like to add extra padding around your exported animation.
Automatically Flatten Layers
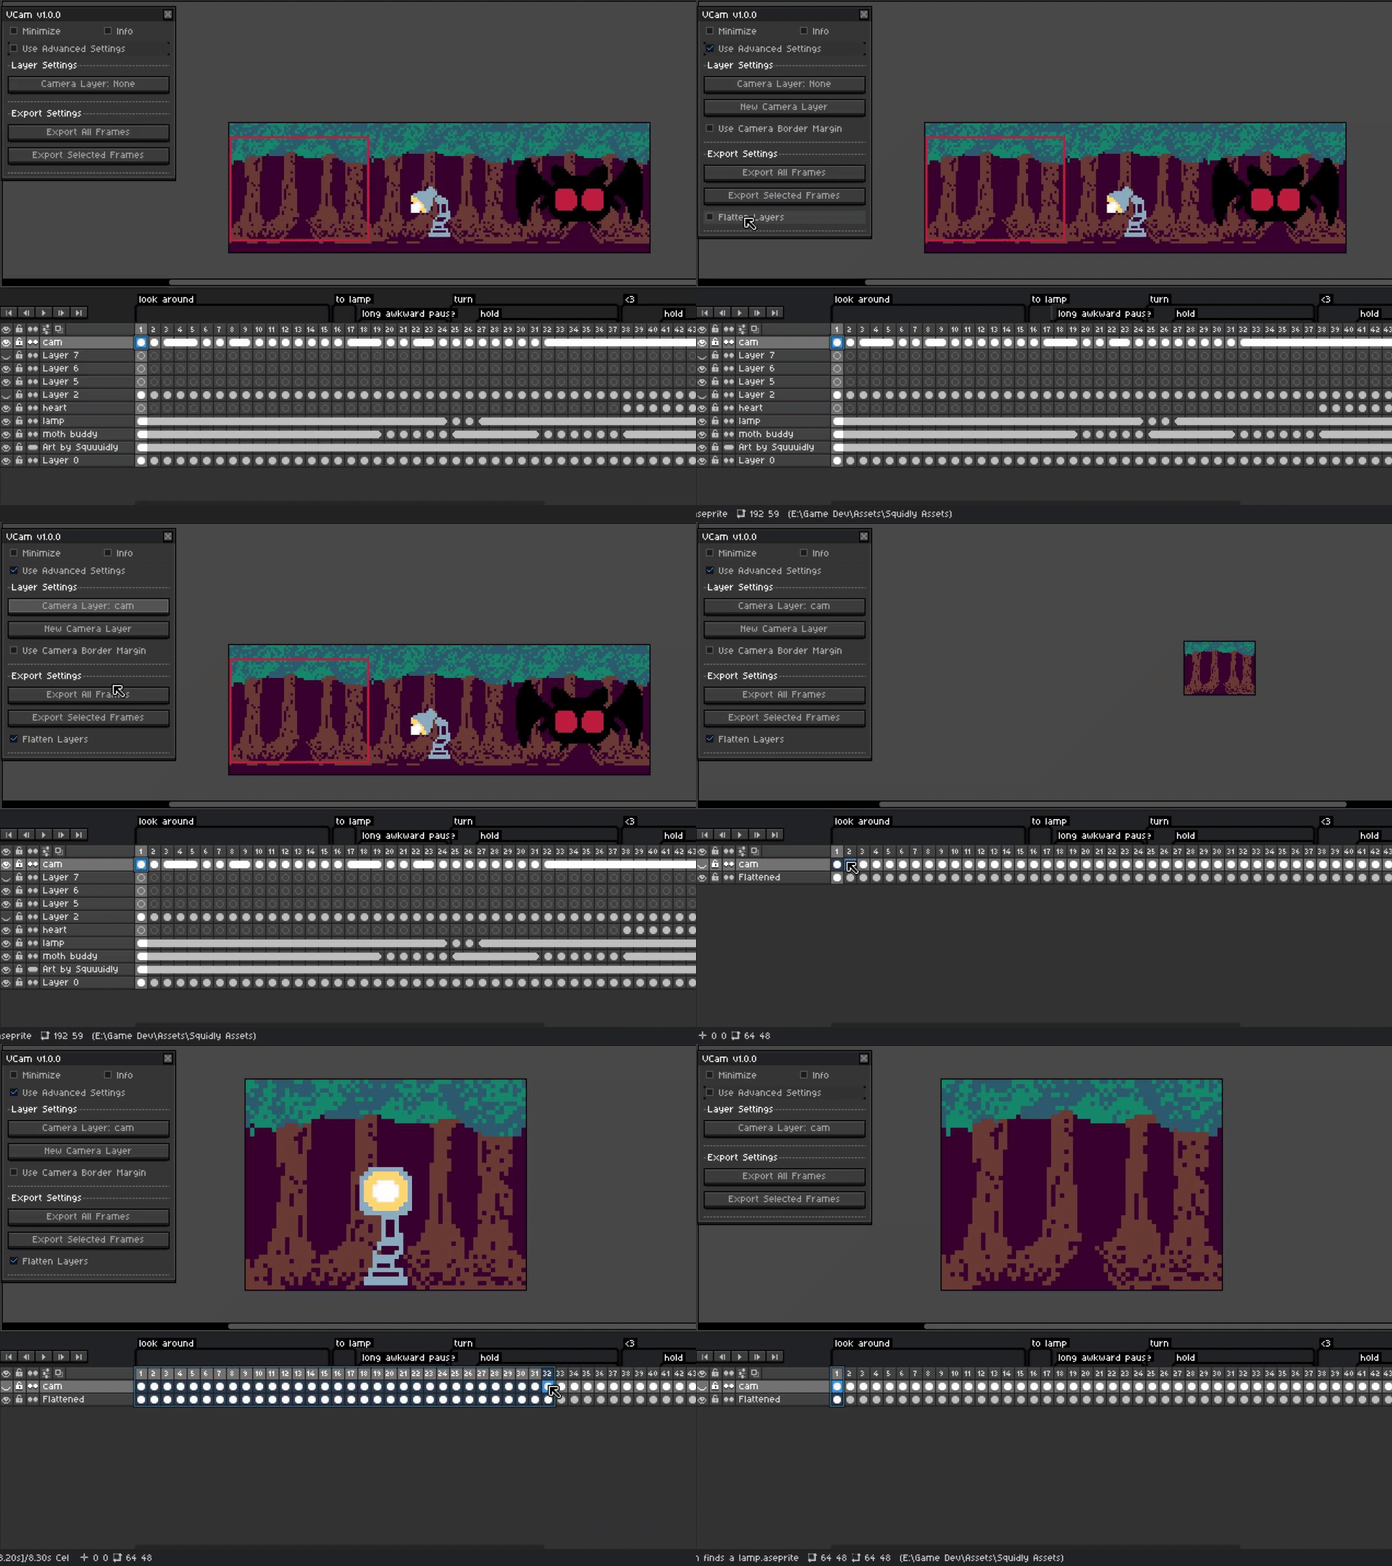
With the flatten layers toggle on the tool will be much faster and flatten down all visible layers but will not include the camera layer.
Built In Help / Information
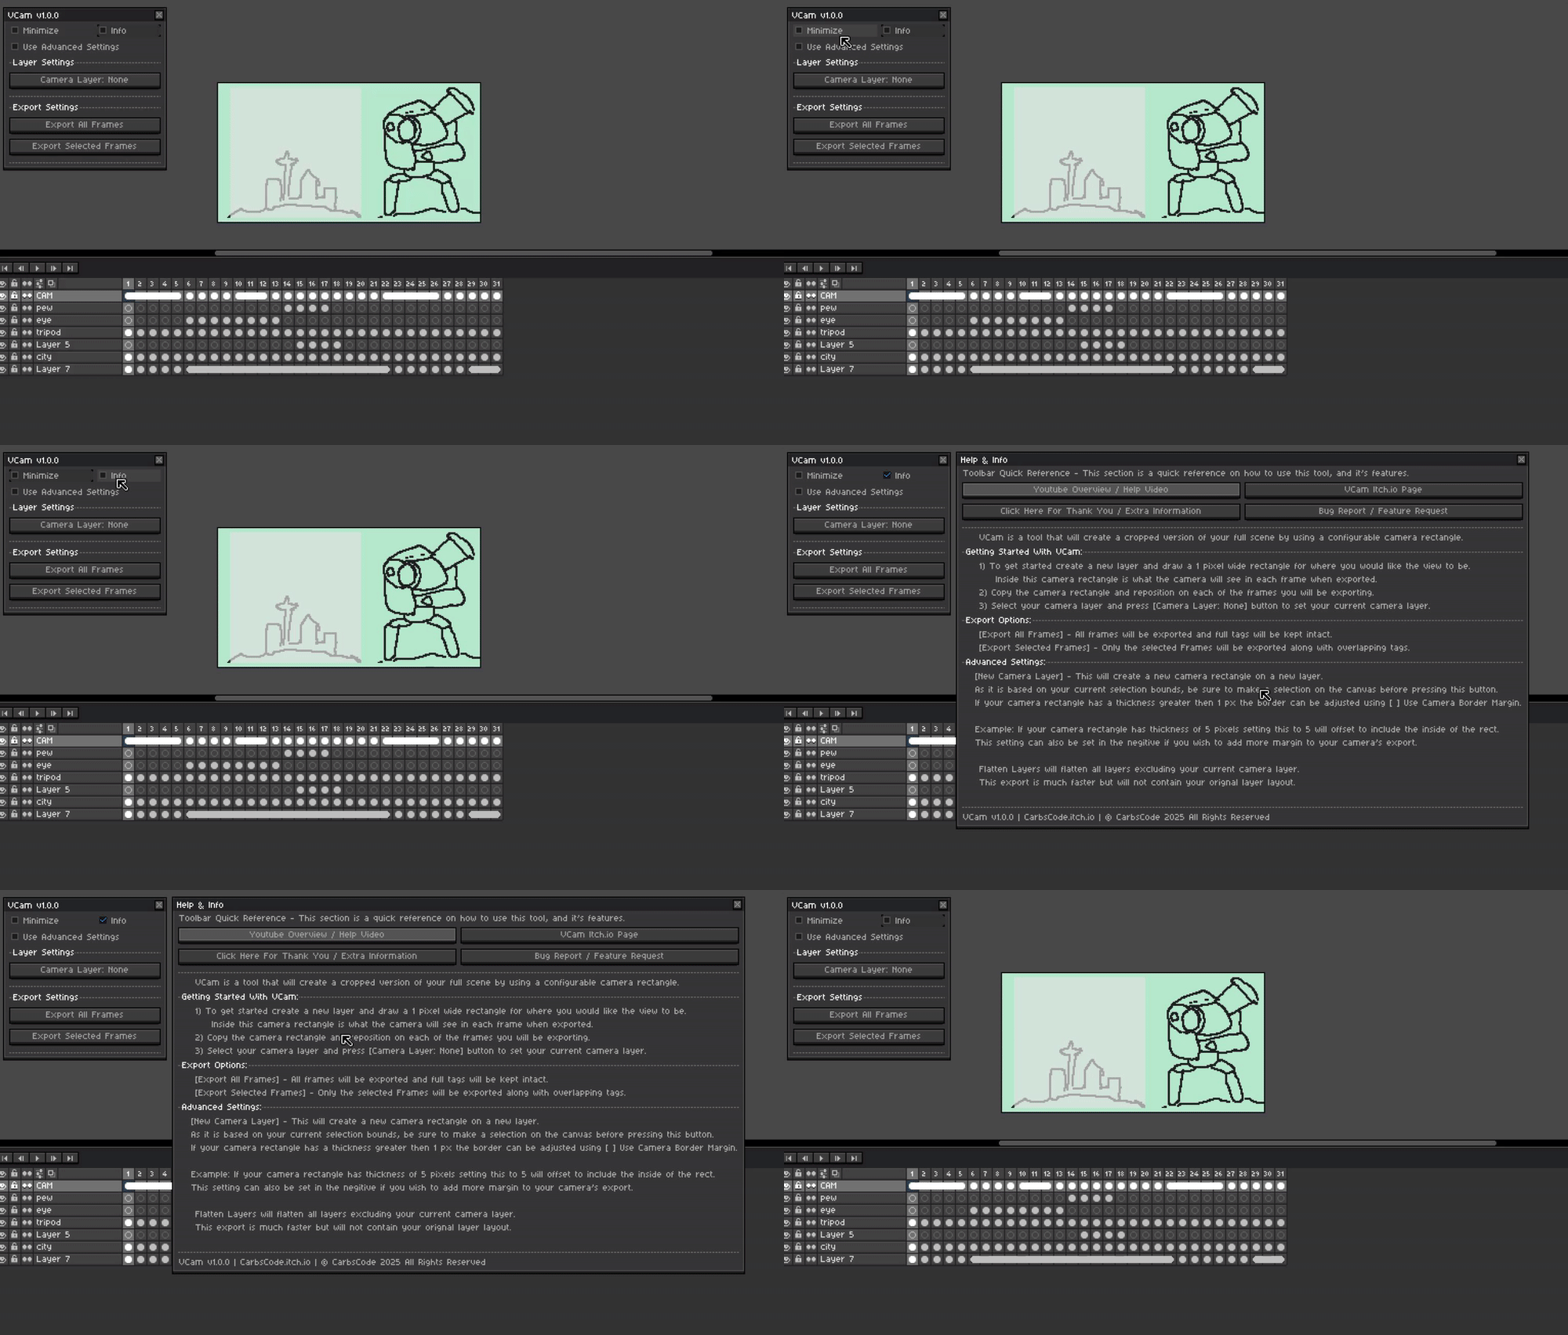
Like with many of my tools, I have provided a built in dialog that shows a quick reference of how to use as well as many helpful links.
Download Link: VCam by CarbsCode
Short Announcement Video: https://youtu.be/rtsoKhJbeLg
Full Overview Video: https://youtu.be/4ugs4NGnM1I
