Can someone explain me in the custom grid settings, what’s the use for everything? (x,y,width,height) With some kind of example…? Or maybe some tip for when use it in a certain useful way…
Thanks
Can someone explain me in the custom grid settings, what’s the use for everything? (x,y,width,height) With some kind of example…? Or maybe some tip for when use it in a certain useful way…
Thanks
Grids are most often used for doing work that has to conform to a tile grid, to show the tile boundaries. This isn’t just for drawing tiles, but also for sprites that are used in tiled environments. Some people use it to manage fixed-size spritesheets as well, e.g. a large sheet of item icons, where the intended workflow of using frames is less convenient.
Grids can also be used as compositional guides, if you size them to split your work up into appropriate sections.
To toggle grids in your current document, check/uncheck View > Show > Grid.
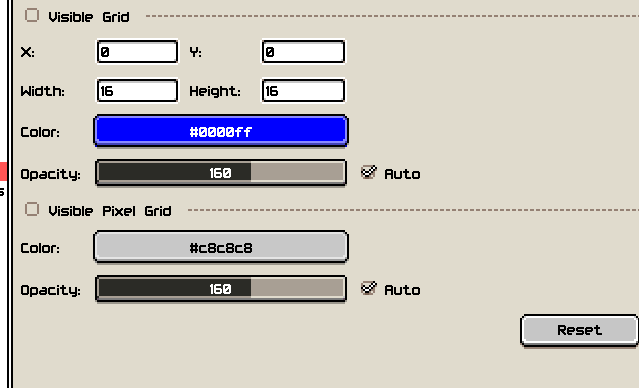
The settings are:
Visible Grid determines whether the grid should be shown for the selected document. Above that is a dropdown that determines whether these settings affect your current active document (if one is open) or newly opened documents (i.e. default settings).
Width and Height are the size of the grid, and these are usually the only settings you’ll need to touch.
X and Y offset the grid relative to the top left corner of your canvas, useful if you need to overlay a grid on something that’s been shifted over or cropped, or if you want to leave a frame around the gridded part of your image.
The Color is the colour of the grid lines, and the Opacity is the opacity of the grid lines, how visible they are. An intense colour at a lower opacity makes for good grid lines as it stands out without overpowering your art. The Auto option decides whether Aseprite should automatically adjust the opacity based on the colours underneath, and in most cases leaving this on helps with grid visibility.