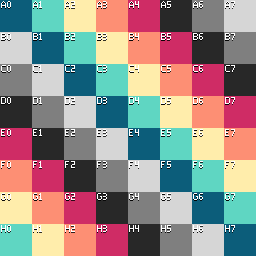
Hey, I made this background for one of my animations and wanted to know if there was a way to animate it as a wavey effect?
Thanks
Hey, I made this background for one of my animations and wanted to know if there was a way to animate it as a wavey effect?
Thanks
Im trying to get it to look like Earthbound battle backgrounds if you know what I mean
Can you post a video of this specific earthbound fight sequence you are looking to emulate
Sure, its not the same pattern but the effect is pretty much the same - just any way to give it a wavy effect. Is there a different software I can use to create an effect like this? I imagine doing it pixel by pixel would be super hard
I dont think there is a way to do anything like that in aseprite, you might want to see if any other programs like gimp or photoshop can help with this
You’d have to script it, offsetting different rows (or columns) of pixels in each frame based on the time and position. It’s a simple sine wave effect. GIMP and PS don’t offer any built-in tool for it either. They have filters for the wave effect but still require manually applying them to each frame or via a script if you want an animation. So, you might as well just script the whole thing so you can iterate more easily.
If this is for a game, I recommend doing it in-engine, using e.g. a shader. That way you only need the one flat texture stored with your game and not every single frame of the animation, and gives you more flexibility with the amplitude, period, direction, etc.
Thanks for the replies guys!
David posted a Plasma Script Demo here that you might find helpful - https://twitter.com/davidcapello/status/1146574185617080320
Here I am 3 years later. I am also trying to find this effect and im pretty bad at scripting. Still trying to find a way to animate a wavey background.
Hi @BlastkinS
To give you an idea of what’d go into making a wavy animation in Aseprite, here’s an example of one possibility. A source image
adapted from this Wikipedia file is turned into this animation
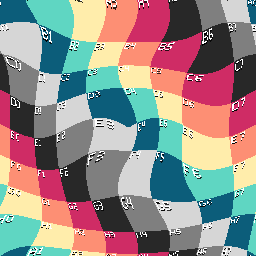
with this script:
-- Clone source image.
local srcImg = app.activeCel.image:clone()
local width = srcImg.width
local height = srcImg.height
local maxDist = math.sqrt(width * width + height * height)
local pi = math.pi
local tau = pi * 2

-- Parameters to play with.
local frameCount = 64
local duration = 1.0 / 24
local xCenter = width * 0.5
local yCenter = height * 0.5
local timeScalar = 2
local spaceScalar = 3
local displace = 10

-- Create the sprite.
local spec = ImageSpec {
    width = width,
    height = height,
    colorMode = ColorMode.RGB,
    transparentColor = 0
}
spec.colorSpace = ColorSpace { sRGB = true }
local sprite = Sprite(spec)

-- Set the sprite palette.
local palette = sprite.palettes[1]
palette:resize(3)
palette:setColor(0, 0)
palette:setColor(1, Color(0, 0, 0, 255))
palette:setColor(2, Color(255, 255, 255, 255))

-- Create new frames, set their duration.
for _ = 2, frameCount, 1 do
    local frame = sprite:newEmptyFrame()
    frame.duration = duration
end
sprite.frames[1].duration = duration

-- Access the first layer.
local layer = sprite.layers[1]

-- Loop through frames.
for frNo, frObj in ipairs(sprite.frames) do
    -- Map frame number to an angle in radians.
    local frOffset = timeScalar * tau * (frNo - 1.0) / frameCount

    -- Create new image, get pixel iterator.
    local image = Image(spec)
    local pixels = image:pixels()
    for pixel in pixels do
        local x = pixel.x
        local y = pixel.y

        -- Pythagorean theorem / Euclidean distance.
        local run = x - xCenter
        local rise = y - yCenter

        local distSq = rise * rise + run * run
        local dist = math.sqrt(distSq)

        -- Map normalized distance to [-PI, PI],
        -- or any range of angle in radians.
        local normDist = dist / maxDist
        local phi = pi - tau * spaceScalar * normDist
        phi = phi + frOffset

        -- Displaced x, y
        local xDispl = 0.0
        local yDispl = 0.0

        -- Perform whatever cosine, sine manip
        -- based on distance and time.
        local sinTheta = math.sin(phi)
        local cosTheta = math.cos(phi)
        xDispl = x + cosTheta * displace
        yDispl = y + sinTheta * displace

        -- Round from real number to integer.
        xDispl = math.floor(0.5 + xDispl)
        yDispl = math.floor(0.5 + yDispl)

        -- Clamp or wrap.
        xDispl = xDispl % width
        yDispl = yDispl % height

        -- Get hex code from source image,
        -- assign to destination image.
        local hexCode = srcImg:getPixel(xDispl, yDispl)
        pixel(hexCode)
    end

    sprite:newCel(layer, frObj, image, Point(0, 0))
end
For a sense of how you can play around with the effect, here is a variation:
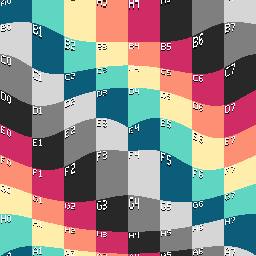
The displaced x is the same as the original image’s. Only y is changed by the sine. You could also consider what would happen when the distance measured is not rise * rise + run * run, but only rise * rise or only run * run.
The documentation for Aseprite’s scripting API is here. I also wrote a scripting tutorial.
With a background in scripting, there are a lot of resources – so many that it can be overwhelming – out there on textures in video games and creative coding that partially match what you’re after. It’s about finding the closest fit and adapting it.
If, like OP, your inspiration is Earthbound (Mother 2), these look promising:
https://www.lexaloffle.com/bbs/?tid=2847
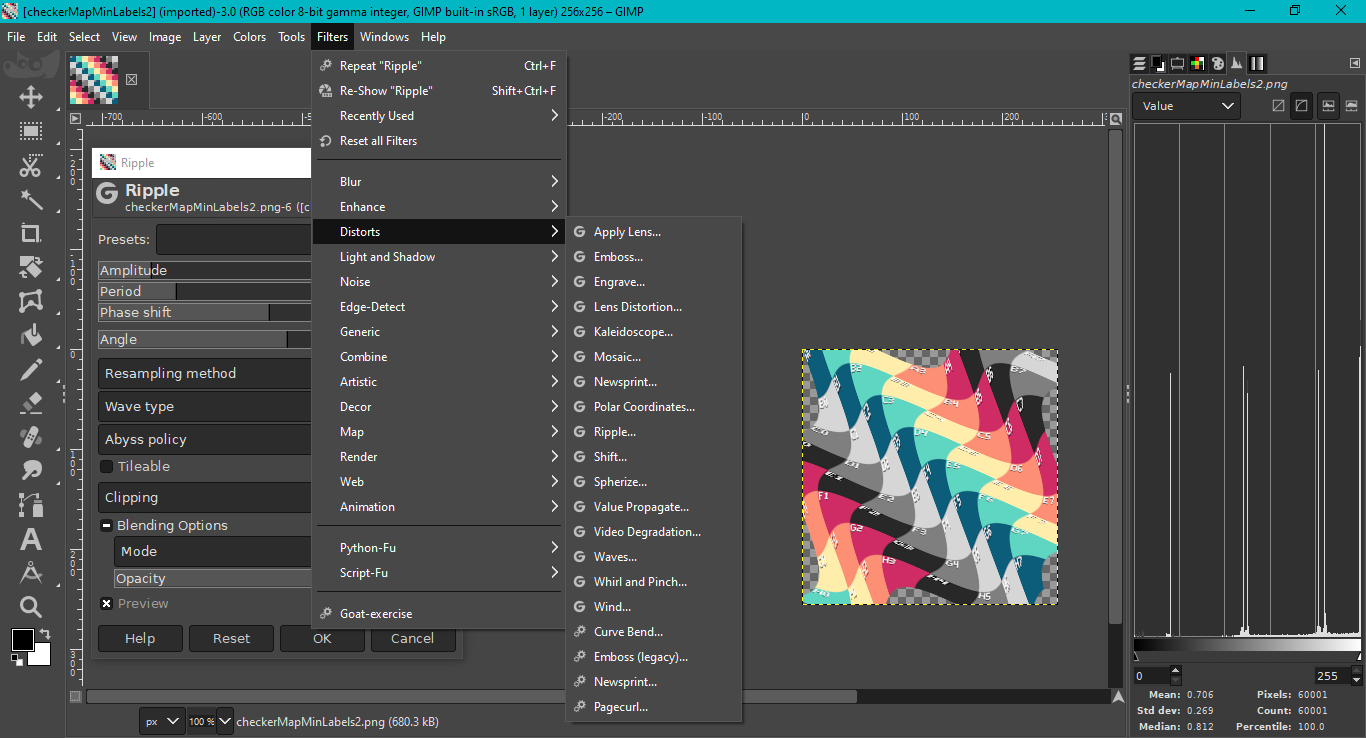
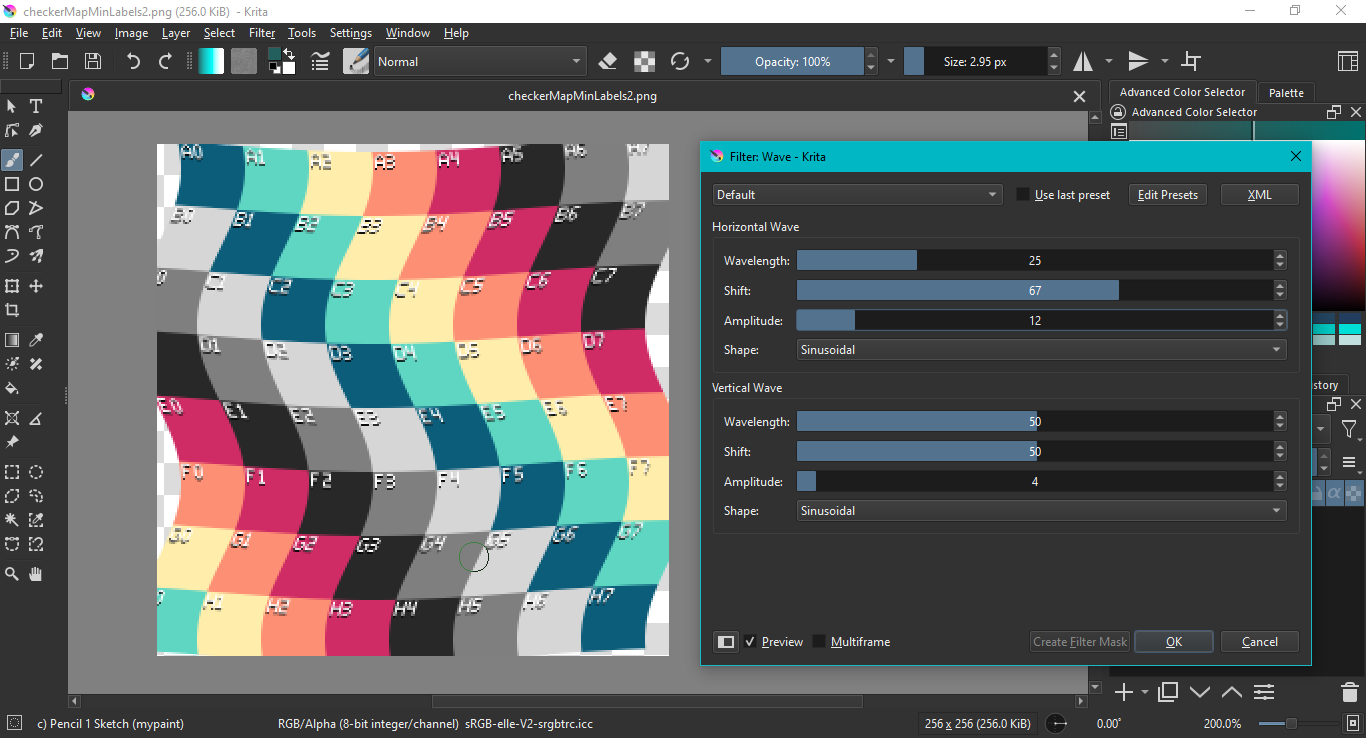
If you’d rather make one frame at a time, then bring them together in Aseprite, here are screencaps from GIMP and Krita:
Like eishiya said, an animated effect is best accomplished with shaders, especially if you are making a video game.
Cheers,
Jeremy