Just A Purple Tree

For now, I’m just making the leaves/bushes(?)of the tree

This is what I made so far by following Mr Medeiros’ tutorials

Yeah, I think they’re a little too obviously ugly and deformed upon closer inspection

Thoughts?

1 Like

First off, I like how the leaf/flower textures look. I see some greys in the lighter purples are throwing me off. How far away do you want us to view the tree? I think the depth feels off because of the desaturated colors for the darks. I really like the colors and if you made the leaves combine in less uniform sphere shapes you might end up with a better shape. Here’s an example of what it could look like with just a palatte change.(don’t know if the tree being desaturated green was important)

1 Like

The green was a sort of stylistic choice, tbh

I was mostly using the tool to change all the HVS at the same time

Also, less uniform sphere shapes, I kinda tried keeping em close because I wasn’t sure how far away they could be and only figured out recently how Medeiros made his sphere uneven specifically

Thanks

Sorry, been awhile, kinda got back to things one by one

Question, how did you get those colors? Because frankly, this is what I am doing

I am using Mr Medeiros’ way, and I am not sure how exactly I can get those brighter yet still similar colors

image
What you do depends on what you want. I didn’t use as many de-saturated colors because I thought it looked out of place. If you make a new layer and fill it with black, then right-click and change its property color mode to saturation you can see the values in your art. What you can then do is find your base color(red or blue in the picture) and then adjust the lightness by enough to create contrast. image
Whenever you want more of an effect, say a fire, you can add more yellow to the brighter colors. For water, you don’t need as much hue shift but both fire and water get more desaturated as they reach the highest value making a smooth transition.

1 Like

Hi @SwordSorcery2020,

I recommend not using numeric increments in HSV and HSL for color shades – neither the Hue/Saturation Adjustment nor the color sliders. A lot of pixel tutorials talk about ‘hue shifting.’ Imo it is a rule of thumb, not a strict math formula. If you’re interested, here is an older thread:

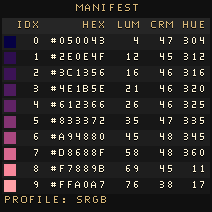
If you need hue adjustment, I’d use perceptual color. To see why, imagine I start with these colors:

manifest2

Then I try Aseprite’s Hue/Saturation adjustment. I increase the hue shift by 30 degrees each time. This is the result:

Especially in the range orange to green, the shadows on the canopy’s bottom left don’t look right. The brightness of highlights can be too bright. Compare with this result, made using a script:

It’s not my opinion that this is a great result, btw, just better. There are still cases where the artist would need to choose how to improve.

I second what Phantom said about looking at your artwork in grayscale as you practice. You have choices for how to do that. I go to Sprite > Color Mode > More Options, then select Grayscale. That shows the options Luminance, HSL and HSV. I then convert from grayscale back to RGB.

gradMapTree

A technique you might find useful is called ‘gradient mapping.’ Grayscale brightness is used to select colors from a gradient. Above, the colors for the blue (left) and orange (right) are from Phantom’s example.

Cheers,
Jeremy

I kinda want what you’re doing right now, that said, even with explanations I am still not sure exactly how to do things

Or how to do it in a way I can do a similar Color Ramp as to Mr Medeiros

Thanks, I’ll try em out, I never saw “gradient mapping” or “luminance” amongst the tutorials i’ve seen

I can only see HSL & HSV

And for some reason, everything’s stuck in gray…kinda confused

I took these screen shots from Aseprite version 1.2.34:

moreOptions

luminanceOption

Once you convert to gray scale, you will only have gray colors to work with. Go to Sprite > Color Mode > RGB Color to convert back to RGB color.

If you find that isn’t convenient, try Phantom’s approach to see if that’s easier for you.

Jeremy

Sorry, I don’t think it works with my current version of Aseprite

I think I’ll try updating via steam, I only open via a file on desktop these days

Was able to do it, but still kinda confused on how to approach next

The idea behind a gradient map is that you focus on drawing shapes out of light and shadow first. Then you make color decisions in a second, separate stage of working on your image. I see some artists remind themselves of where the light source is by drawing an imaginary lightbulb on its own layer with rays of light shooting out of it.

Now, suppose I have a picture of a ball and a box, that I drew with gray colors only: #000000, #222222, #636363, #AEAEAE, #FFFFFF.

My background is on its own layer, and each shape is on its own layer.

gm02

I right click on a grayscale layer in the timeline then duplicate it.

I create a color gradient with the same length as my gray colors. In this case, #347C98, #3AA3A6, #44CCA1, #7CF355, #FEFE33. When I create my color gradient, I’m not worried about the shapes.

I’ve selected my first gray color as my foreground color; I’ve selected my first gradient color as my background color.

Then I go to Edit > Replace Color. I can also hold down Shift and press R as a shortcut.

gm05

This little menu pops up. Also there’s a preview of black being replaced with blue.

gm06

I go through one by one, replacing my grayscale colors with my gradient. If I don’t like the result, I still have my original grayscale shapes on their own layers.

There’s a way to automate this process, but I think it’s better try by hand at this point.

Brandon James Greer has videos where he employs this technique. He uses Photoshop, but it’s important to learn how concepts and techniques go beyond the specific software you’re using.

Thanks, was wondering what you meant

This vid shows it all step by step? Also, never figured out how to do color replacement, never saw a vid on how to do it

Something is wrong, it seems to permanently stay on grayscale


Also, not sure how to do this

Screen Shot 2022-03-30 at 10.15.00 AM

There’s no Grayscale appearing

Also, when you replace colors, how much do you change?


Because I found changing the Hue & Saturation makes it so that it’s all still mainly grays and blacks

Also, what do you mean by Length?

You mean this? Because it’s more or less what I want to make for my own color ramps…just not sure how you did it and the vids’ not that helpful or I can’t follow and can’t find one that works