A rather useful feature in Photoshop for pixel art that I’ve found is the ability to “grow” a selection. This allows one to very loosely select several colour areas, and then have the selection grow to include any adjacent pixels that are similar to the selected pixels (within the Magic Wand tool’s Tolerance). This makes it easy to select e.g. several parts of a character with only two actions, instead of having to Magic Wand them all separately, and without capturing other uses of those colours.
Visual example: here I wanted to select the lighter two colours of the ripples, but only in the big field at the top, without including the highlights in the shadowed area.
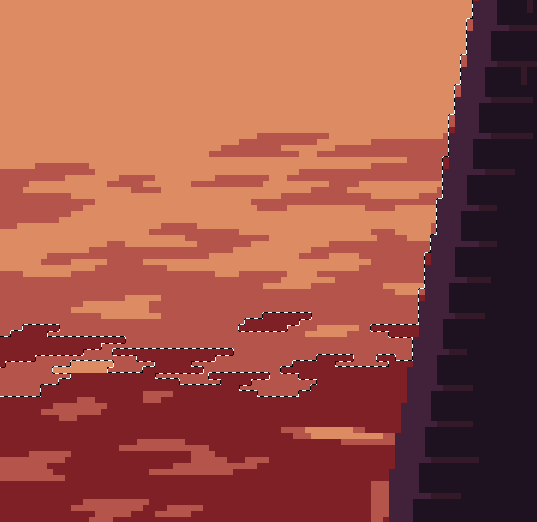
Initial selection:

After Grow:

Combined with the Magic Wand’s pixel connectivity options in Aseprite, this could be even more useful than it is in PS.
It would be also be cool to have two different options for how pixel similarity is determined:
- Any pixel adjacent to any pixel in the selection that’s within the Tolerance of any of the colours within the selection is added to the selection. This is what Photoshop does.
- Only those pixels that are within the Tolerance of the pixels actually next to them are added to the selection. In this mode, the Grow above would give this result:
Notice that the bright spot in the lower left and the anti-aliasing along the dark edge were not selected, because the bright spot was not touching any bright pixels in the selection, and the AA was not touching any darker pixels in the selection.
This mode is particularly useful for pieces with a lot of colour reuse between unrelated objects, where Grow with the first mode would likely capture too much.
I realize that this specific example task could’ve been accomplished with a higher threshold on Magic Wand, but Grow is particularly useful when you want to select areas of disparate colours where a higher Tolerance would capture unwanted areas as well.