Pretty much the title.
Thanks in advanced
When erasing on a Background rather than a regular layer, it’ll erase using whatever colour you have set as your background colour (which is black in your case). If you work on a regular layer, or select transparent as your background colour (right-click transparency in your palette), you’ll get the result you want.
How do you select a specific color as your background color?
Right click the colour in your palette, or Alt+right click from the artwork.
Setting background color to transparent is not working for me.
I generally have the issue that erased pixels are not transparent when working on someone else’s png.
The only solution I found was to use Indexed colors:
Yet when I create my own RGBA files it just works, so I don’t see why I’d need Indexed color.
I wish there was a more obvious way to just set and visualize the transparent color as any color, with actually the transparent color by default.
UPDATE: tried it again and still doesn’t work on most PNG files downloaded from the net that were not originally using transparency. I opened an issue for this: Downloaded PNG in RGB mode fails to support transparency: erase uses secondary color and export PNG replaces transparent color with black · Issue #4370 · aseprite/aseprite · GitHub
I would first convert from a background layer to a regular layer, as mentioned above.
In the screen capture below, I used replace color, but there’s more than one way to go abou tit.
(A quirk of the Sonic image you linked is that it has two near identical blues.)

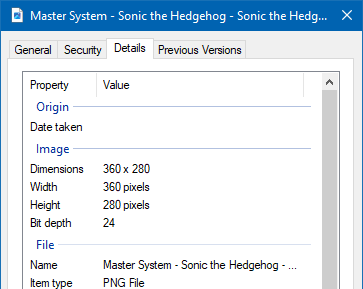
If you check the properties of the image, you’ll see the bit depth. The sonic sprite sheet is originally 24 bits – meaning 8 bits per 3 channels RGB. No alpha. After converting the background to a regular layer and re-saving, it’s 32 bits, for RGBA.
Edit: As you can see, I’m on Windows. If you notice anything different about the process in Linux, then maybe that’s part of the issue.
Basically the opposite of this:
If you change the image’s color mode to indexed, then save to a file format that supports indexed, its bit depth will be 8. Indexed color images reference palette indices in the range [0, 255].
app.command.OpenFile()
app.command.LayerFromBackground()
A script might be able to automate this for you. As usual, there’s more than one way to accomplish that – with commands and without.
Many thanks, that should solve my issues! I remember the Background layer thing now, I think I used to create a new layer on top every time, then I forgot about it. And I didn’t know you could directly convert layer type! That will make things much faster.
I didn’t find the command to see bit depth on Linux but I could check that other graphics editors like Gimp would honor the image format per layer (if you import an RGB file, erase will leave white, if you import an RGBA file, erase will leave transparent pixels).
I didn’t know about Replace Color (Shift+R), it works even when you don’t use Indexed Color mode + Edit Color (A) so nice to quickly change color palette without regenerating color palette from sprite + switching to Indexed Color mode (which may be difficult on a big file with various experiments using many colors). And of course as I wanted originally, to replace BG color with alpha 0 without having to use a big eraser nor Indexed Color Mode.
It’s good to know there’s an API too. Since it’s still pretty fast with the UI I’ll probably stick to Convert layer to normal layer + Replace color to transparent for now.