Hello, I’m currectly using a compiled Windows version of Aseprite which is in ver1.2.27dev. I want to update to 1.3beta6 for all the new features and also if I have to recompile again I know what to do. So I try to follow the instuction on the install.md which said to input these commands.
cd aseprite
git pull
git submodule update --init --recursive
I understand the first command on the install.md file which I think it mean to change directory but the second command is a confusing. I think it has to do with transfering code from directory to another. I haven’t understand the third command
but if I have to guess this command changes the old source code to a new one. In short, I failed to recompile Aseprite. So after failing to recompile Aseprite I try to look for information on the internet about recompiling Aseprite but the information too vague for me to understand. So I want a better explantation on how to recompiling Aseprite and possibly explantation on how the git commands work. Thank you
What I’m referencing for intsall.md
This link should be useful for understanding how to clone from github: Cloning a repository - GitHub Docs
As an overview on how git works, it saves versions of a set of files over time in a repository. When you download from github you create a local version of the files, meaning that any changes you might make in the code from the original are on your machine alone. The command for downloading from a repository is called a pull. Similarly, if you were to make any changes and send them back to the github server, you would use the command push - but you don’t really need to worry about that second one, this is just to give a little context on the meaning of the command.
There’s an additional line from the install instructions that you haven’t mentioned above which is:
git clone --recursive https://github.com/aseprite/aseprite.git
You need to make sure that you call this command first from the base folder that you want the files to be downloaded to. This turns your directory into a git repository which can now connect to github’s server and access the latest aseprite repository. If command line complains that it can’t find the Git command then you need to install Git (: So now when you use git commands, your local files (the ones currently on your machine) can be compared with the latest ones on the server and then only the files that are different will be downloaded.
I’m a little rusty on Git but I’m fairly certain that’s all you need to do to make the other commands work. The commands ‘git pull’ and ‘git submodule update --init --recursive’ should handle the file download and install, and I don’t see any reason why the compile shouldn’t just work after that, but I may not be the best person to ask, I usually avoid using git when I can 
You are absolutely right about the first line changing directory btw. You just need to make sure that the path that you enter after the cd is the correct one that goes to your aseprite directory.
Hopefully, this helps somehow. If you still have issues best thing is to post any errors or warnings that pop up. That way other folk can work out exactly what it is that’s causing the compile to fail. I always get confused with how Git works and I’ve been using it for years so no worries if you don’t get it right away!
Also, a final note. It may be easier for you to use a git GUI rather than command line. I think Github have their own which is fairly easy to use. It’s just a bit more intuitive and you don’t need to remember the commands. It can then also show you information on previous versions that are available if you ever need to roll back or if an install messes up it’s a lot easier to see what went wrong.
Sorry for the long repsonse time, but when I try to recompile Aseprite the source code is in the new directory Aseprite with the screenshot shown below. When I open Aseprite still say its in ver 1.2.27dev, most likely due to the source code hasn’t update throughout my file where I store Aseprite shown in the screenshot. Not sure what to do next after this since install.md has no instuction after doing the using the git commands but thanks for helping me figure out how to recompile Aseprite.
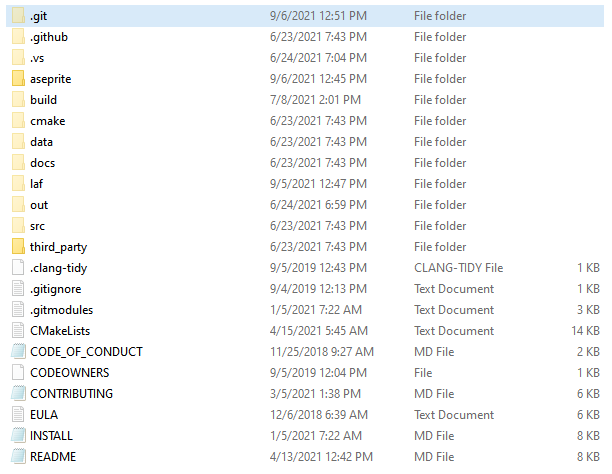
Ah okay, so if I understand correctly, you now have something to the effect of C:/Programs/Aseprite/Aseprite with this screenshot been taken from within the first aseprite folder? I think my previous answer may have been misleading as I said to install from within the base folder, but you actually want it to be outside the base folder (that’s probably because I’m in the habit of always creating a new folder when I download a new repository, and didn’t consider that you may not have done this the first time!)
So you’ll need to remove the existing repository and repeat the install from one directory up.
You can delete the repository and I think it’ll take all of the new files with it (this might be useful: How do I delete a local repository in git? - Stack Overflow). If not you should be able to delete the new aseprite folder normally after the repository is deleted.
Don’t worry if you delete anything from the original install as git should work out which files you don’t already have, just make sure that your project files are saved elsewhere so you don’t lose any work!
You don’t want the repository to be created in a folder that contains anything other than the Aseprite files as git will compare with every file in that folder and will cause problems when you want to install new versions down the line. I would advise going to the parent directory (i.e. in my example above that would be ‘Programs’) and create a new empty folder called something like AsepriteSource or AsepriteRepo. Then you want to move the original Aseprite folder into this new one and repeat the install process using AsepriteSource as your root repository folder.
In the end you should have something like C:/Programs/AsepriteSource(containing all the git files)/Aseprite(contains the full install)
Once this is set up you shouldn’t need to do any of this stuff again, so future updates should only require the pull and update commands (:
Hope that fixes it!