In this video, you can see that when I convert the layer to a tilemap, Aseprite detects two different tiles even though it’s the same tile, just flipped.

In this video, you can see that when I convert the layer to a tilemap, Aseprite detects two different tiles even though it’s the same tile, just flipped.
Yeah, they may look the same, but Aseprite sees them as different tiles because one is flipped. Even if the pixels match perfectly, the orientation matters. Flipping a tile changes how it’s stored and referenced in the tilemap. So tile 47 and tile 48 aren’t duplicates, they’re technically different because of that transformation.
It’s kind of like having two identical playing cards, but one is upside down, the same image, just a different position. The engine needs to know that difference so it can render things correctly and keep track of what’s what.
I thought these buttons were supposed to detect that and prevent duplicate tiles like in the video.
So what are these buttons for when converting a layer to a tilemap layer?

I hope you don’t mind if I ask something obvious, but which of those allowed flips are enabled? In the video, I see you pass the cursor over these flag buttons, but I don’t see any indication that they are being clicked.
In the past, the default Aseprite UI theme has been really bad at indicating when you’ve enabled these flags. That’s why I’m asking.
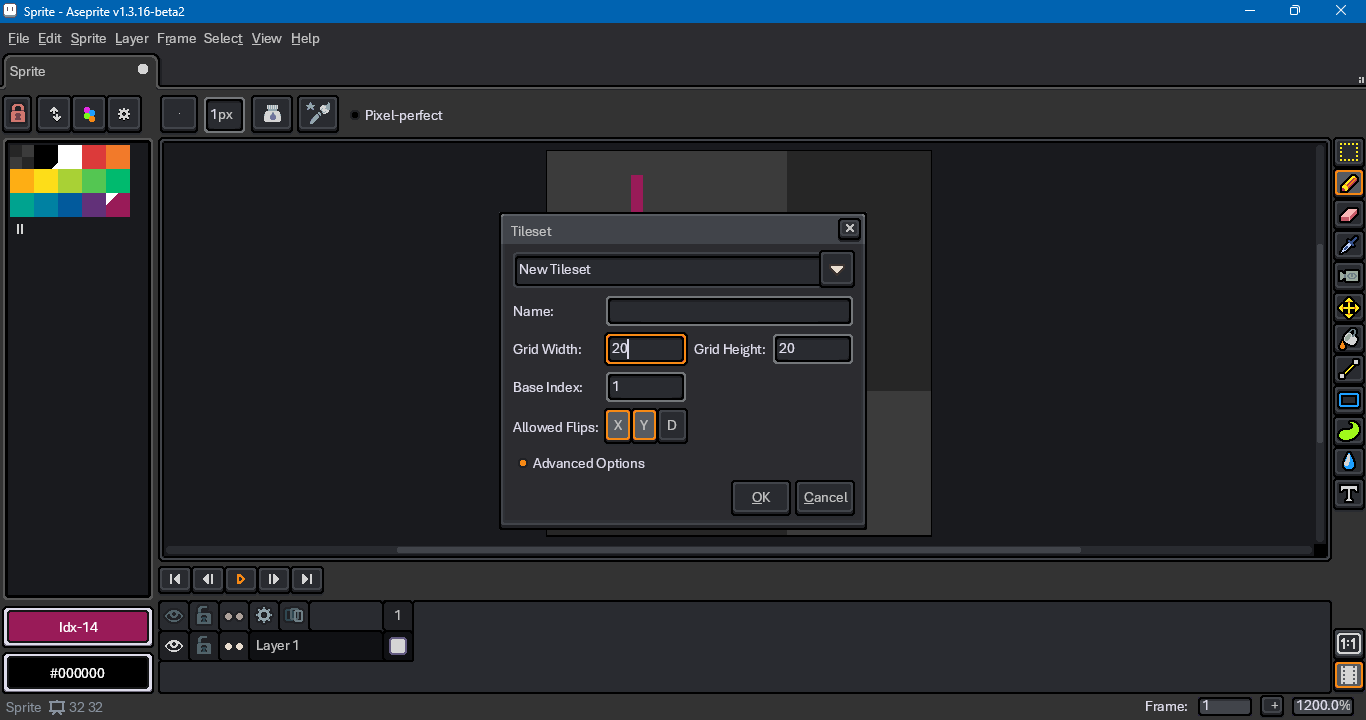
In the screen capture above I have X and Y enabled, but not D (diagonal, or transpose).
I guess if the button is dark, then it’s being pressed.
In this screenshot, the X and Y buttons are pressed, but the D button isn’t.
In the video, they’re all pressed.

Ok, my mistake — it’s the other way around. If the button is light, then it’s pressed. I don’t know why it’s like that, but it seems that’s how it works.
I interpreted that if the button is dark, it’s because it’s pressed down.
But it seems the intention is that if the button is dark, it’s off, and if it’s lit up, it’s on.