A Grayscale color option overhaul

So i was messing around with grayscale option and i notice a fatal flaw that render it an useless option basically, see the thing about grayscale is that hues have their own native values, grayscale is not just value is hue, saturation and value rendered in grayscale in that order, hell thats why hue shifting works hue, saturation and value arent separeted thing they cascate down in that order ultimately deciding the value of the color, and that VERY important, you see i know nobody is going to paint grayscale is useless, people change into grayscale to proofread the contrast in the artwork since thats between other things is the main form of guiding the viewer throught a piece.
too LOW contrast and everything blend together, too HIGH contrast and it hurts the eye to see.

Now to the actual point here aseprite treats grayscale as pure value as you can see here image

When other like photoshop and krita do this correctly and threat it differently.
image
Krita even display the difference in the actual color picker.
image

Heres is an example of what aseprite does with the colors


and heres is a correct example from photoshop krita does this but their color picker in grayscale is alredy correct anyway.

mind you these are Red, Green, Blue and Yellow in that order and they are all 255 saturation and 255 value.

i feel this is a serious issue and needs adressing.
i am looking at you dacap.

:sweat_smile: :eyes:

Hi there @Ethan_Buttazzi, just in case, did you try the Sprite > Color Mode > More Options > Grayscale with Luminance?

image

I think that might be what you are looking for (at least for the RGB → Grayscale conversion point).

ok thats will do, but you’re on thin ice.
also even in this color mode is put on grayscale from luminance, the hue factor is still not acconted for, even if its not the exact point mentioned, consistency is important.

I think what OP is asking for, if somewhat rudely (or maybe I just missed the humour), is the ability to use Rec. 601 Luma (and ideally other calculations as well) for greyscale conversions, and to allow previewing value with a chosen conversion in the colour picker.

I don’t know what exactly the math behind the Luminance conversion is, but it’s definitely different from any Luma conversion I’ve worked with, and the results do not feel quite “right”. That said, the extremes are only useful for checking the math, and aren’t actually good examples in practice - for realistic scenarios, Aseprite’s Luminance does alright. Still, it would be nice to know what the heck it actually is. I get the feeling it might be an attempt at Rec 601 Luma with improper rounding…

Any grayscale conversion will be flawed because the apparent lightness of any given hue is subjective and no digital colour model is perfect, so it would be nice to have more options, both for personal preference, and for consistency with art made in other software.

2 Likes

Hi all,

I know I’m late to the party, but I wanted to chip in. Color is not my specialty, so if anyone knows more about it, correct away. I looked at this Wikipedia section on HSL and HSV. Given this image, the default Aseprite gray conversion is

which looks like luminance per rec. 709 with a gamma adjustment of 1.0.

Then I wrote this script as a test against the two controls (Aseprite default and Wikipedia) using this table as reference.

The example script below implements 601 and 709.

local dlg = Dialog { title = "Luminance Gray" }

dlg:combobox {
    id = "standard",
    label = "Standard:",
    option = "REC_709",
    options = { "REC_601", "REC_709" }
}

dlg:number {
    id = "gamma",
    label = "Gamma Correction:",
    text = string.format("%.1f", 1.0),
    decimals = 5
}

dlg:button {
    id = "ok",
    text = "OK",
    focus = true,
    onclick = function()
        local args = dlg.data
        if args.ok then

            -- Rec. 709
            local rcoeff = 0.2126
            local gcoeff = 0.7152
            local bcoeff = 0.0722

            if args.standard == "REC_601" then
                rcoeff = 0.2989
                gcoeff = 0.587
                bcoeff = 0.114
            end

            local gm = args.gamma

            local sprite = app.activeSprite
            if sprite then
                local srcLyr = app.activeLayer
                if srcLyr and not srcLyr.isGroup then
                    local srcCel = app.activeCel
                    if srcCel then
                        local srcImg = srcCel.image
                        local srcItr = srcImg:pixels()

                        local i = 1
                        local px = {}
                        for srcClr in srcItr do
                            local hex = srcClr()
                            local b = (hex >> 0x10 & 0xff) / 255.0
                            local g = (hex >> 0x08 & 0xff) / 255.0
                            local r = (hex >> 0x00 & 0xff) / 255.0

                            r = r ^ gm
                            g = g ^ gm
                            b = b ^ gm

                            local lum = rcoeff * r
                                      + gcoeff * g
                                      + bcoeff * b
                            local lum255 = math.tointeger(0.5 + lum * 255.0)
                            local aMask = hex & 0xff000000
                            local grayclr = aMask | lum255 << 0x10
                                                  | lum255 << 0x08
                                                  | lum255
                            px[i] = grayclr
                            i = i + 1
                        end

                        local trgLyr = sprite:newLayer()
                        trgLyr.name = args.standard
                        local trgCel = sprite:newCel(trgLyr, srcCel.frame)
                        local trgImg = trgCel.image
                        local trgItr = trgImg:pixels()
                        i = 1
                        for trgClr in trgItr do
                            trgClr(px[i])
                            i = i + 1
                        end

                        app.activeLayer = srcLyr
                        app.activeCel = srcCel
                        app.refresh()
                    else
                        app.alert("There is no active cel.")
                    end
                else
                    app.alert("The layer is a group.")
                end
            else
                app.alert("There is no open sprite.")
            end
        end
    end
}

dlg:button {
    id = "cancel",
    text = "CANCEL",
    onclick = function()
        dlg:close()
    end
}

dlg:show { wait = false }

(There’s a bug in this script when the source image has alpha. I’m just using it for testing.)

Rec. 709 with a gamma of 1.0 gave me this. That looks like the above to me.

Rec. 601 coefficients with a gamma of 1.0 gave me this

I wasn’t sure how much the gamma mattered. The most common exponents I’ve encountered are 2.2 and 2.4 and their inverses: 1.0 / 2.2 = 0.454545…, 1./0 / 2.4 = 0.46666… Below is 709 with 1.0 / 2.2:

Does the luminance have to be corrected in relation to g (i.e., raised to 1 / g) after the r, g and b are raised to g? If so, I did that part wrong in the script above.

I don’t know if the colors of a shades widget can be updated after a dialog is opened. If so something like that could be explored as a luminance preview of colors in a palette.

lumPalette

A prototype:

local function foo()
    local pal = app.activeSprite.palettes[1]
    local len = #pal
    local clrs = {}
    local gamma = 1.0
    local rcoeff = 0.2126
    local gcoeff = 0.7152
    local bcoeff = 0.0722
    for i = 1, len, 1 do
        local srcClr = pal:getColor(i - 1)

        local rf = srcClr.red / 255.0
        local gf = srcClr.green / 255.0
        local bf = srcClr.blue / 255.0

        rf = rf ^ gamma
        gf = gf ^ gamma
        bf = bf ^ gamma

        local lum = rcoeff * rf
                  + gcoeff * gf
                  + bcoeff * bf
        local lum255 = math.tointeger(0.5 + lum * 255.0)
        local a255 = srcClr.alpha
        clrs[i] = Color(lum255, lum255, lum255, a255)
    end
    return clrs
end

local function bar()
    local pal = app.activeSprite.palettes[1]
    local len = #pal
    local clrs = {}
    for i = 1, len, 1 do
        local srcClr = pal:getColor(i - 1)
        clrs[i] = srcClr
    end
    return clrs
end

local dlg = Dialog { title = "Luminance Gray" }

dlg:shades {
    id = "foo",
    mode="pick",
    colors=foo()
}

dlg:newrow()

dlg:shades {
    id = "bar",
    mode="pick",
    colors=bar()
}

dlg:button {
    id = "cancel",
    text = "CANCEL",
    onclick = function()
        dlg:close()
    end
}

dlg:show { wait = false }

Replace foo with whatever you think the appropriate metric should be.

Lastly, I have indeed heard of an artist who does initial drafts in grayscale and then either (1.) places layers with different blend modes over the grayscale layer or (2.) supplies the luminance as a factor to a color gradient evaluation function. Brandon James Greer has employed this technique (in Adobe Photoshop).

Best,
Jeremy

2 Likes

you’re not late at all, it isn’t even a month since this thread was opened :]

nice script, thank you!

however, to clarify (or add more confusion), i don’t think the reason aseprite conversion seems off is related to rec.601 at all. let me demonstrate - i tried to convert this:

in xnview:
Clipboard-1
xnview produces somewhat smoother gradient, but it’s pretty dark too.
here’s photoshop:
gray2
imo not even photoshop is doing stellar job here, but it is arguably much better.

i’ve made few quick tests on the colour wheel (i also changed coeffs according to adobe values listed in the table just to see what happens):


and my guess is that you’re right - aseprite is (or is closest to) rec.709. however the difference between rec.709 and rec.601 is not too big. also gamma won’t help, quite contrary - 0.454545 makes the gradient lighter, but not correct and it did introduce artefact in form of ring around the circle.

i didn’t find anything about adobe color engine (ace) conversions (which is not surprising). but there must be some form of compensation to achieve results closer to human perception. eishiya is right, that it will probably never be perfect, but people do try: Comparing HSLuv to HSL - Human-friendly HSL

i wouldn’t know how to implement that, however i found similar (albeit slightly worse) option: HSP Color Model - Alternative to HSV (HSB) and HSL
brightness in HSP calculation is sqrt( .299 R^2 + .587 G^2 + .114 B^2 )

so i tried that approach and it looks much better:
gray3


again, not same as photoshop results, but much much closer. i guess more tests are needed, but it looks very promising!
PS. i’d stick with rec.709 coefficients, they seem to get the best result imo.

1 Like

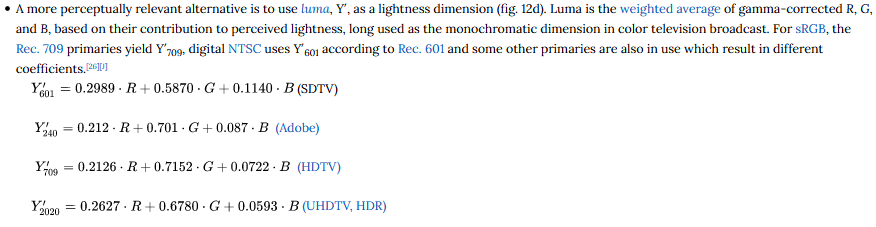
Thanks @Olga_Galvanova, much obliged for all the research.

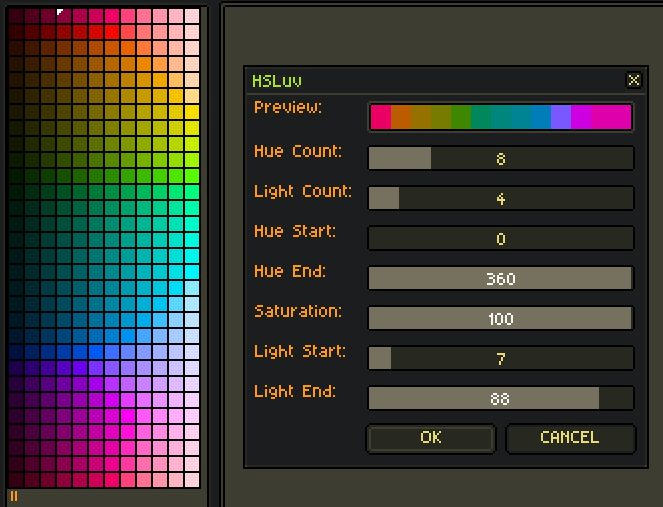
I looked at the HSLuv website you linked. A Lua implementation has been written by Alexei Boronine. I tried generating a palette with it.

-- https://github.com/hsluv/hsluv-lua/blob/master/hsluv.lua
dofile("./hsluv.lua")

local dlg = Dialog { title = "HSLuv" }

dlg:shades{
    id = "preview",
    label = "Preview:",
    mode = "pick",
    onclick = function(ev)
        if ev.button == MouseButton.LEFT then
            app.fgColor = ev.color
        elseif ev.button == MouseButton.RIGHT then
            app.bgColor = ev.color
        end
    end,
    colors = {
        Color(0xff6400ea),
        Color(0xff005cbc),
        Color(0xff007295),
        Color(0xff007c77),
        Color(0xff00873f),
        Color(0xff5d8800),
        Color(0xff7c8600),
        Color(0xff938300),
        Color(0xffb77e00),
        Color(0xffff5979),
        Color(0xffe200cd),
        Color(0xffaa00de) }
}

dlg:slider {
    id = "hueCount",
    label = "Hue Count:",
    min = 1,
    max = 32,
    value = 8
}

dlg:slider {
    id = "lightCount",
    label = "Light Count:",
    min = 1,
    max = 32,
    value = 4
}

dlg:slider {
    id = "hueStart",
    label = "Hue Start:",
    min = 0,
    max = 360,
    value = 0
}

dlg:slider {
    id = "hueEnd",
    label = "Hue End:",
    min = 0,
    max = 360,
    value = 360
}

dlg:slider {
    id = "sat",
    label = "Saturation:",
    min = 0,
    max = 100,
    value = 100
}

dlg:slider {
    id = "lightStart",
    label = "Light Start:",
    min = 0,
    max = 100,
    value = 7
}

dlg:slider {
    id = "lightEnd",
    label = "Light End:",
    min = 0,
    max = 100,
    value = 88
}

dlg:button {
    id = "ok",
    text = "OK",
    focus = true,
    onclick = function()
        local args = dlg.data
        if args.ok then

            local hueCount = args.hueCount
            local lightCount = args.lightCount
            local hueStart = args.hueStart
            local hueEnd = args.hueEnd
            local saturation = args.sat
            local lightStart = args.lightStart
            local lightEnd = args.lightEnd

            local palIdx = 0
            local totLen = hueCount * lightCount
            local palette = Palette(totLen)

            local iToFac = 1.0
            local jToFac = 1.0
            if hueCount > 1 then iToFac = 1.0 / (hueCount - 1.0) end
            if lightCount > 1 then jToFac = 1.0 / (lightCount - 1.0) end
            for i = 1, hueCount, 1 do
                local iFac = (i - 1) * iToFac
                -- This is a simplification, there are four options
                -- to lerp hue: CW, CCW, near and far.
                local hue = (1.0 - iFac) * hueStart
                                 + iFac  * hueEnd
                hue = hue % 360.0
                for j = 1, lightCount, 1 do
                    local jFac = (j - 1) * jToFac
                    local lightness = (1.0 - jFac) * lightStart
                                           + jFac  * lightEnd

                    local rgbtuple = hsluv.hsluv_to_rgb({
                        hue, saturation, lightness
                    })

                    local r = rgbtuple[1]
                    local g = rgbtuple[2]
                    local b = rgbtuple[3]

                    r = 255.0 * r + 0.5
                    g = 255.0 * g + 0.5
                    b = 255.0 * b + 0.5

                    r = math.tointeger(r)
                    g = math.tointeger(g)
                    b = math.tointeger(b)

                    local aseClr = Color(r, g, b, 255)
                    palette:setColor(palIdx, aseClr)
                    palIdx = palIdx + 1
                end
            end

            app.activeSprite:setPalette(palette)
            app.refresh()
        end
    end
}

dlg:button {
    id = "cancel",
    text = "CANCEL",
    onclick = function()
        dlg:close()
    end
}

dlg:show { wait = false }

The HSL inputs are dialog friendly, as the ranges [0, 360], [0, 100] and [0, 100] are accepted. The outputs are in [0.0, 1.0] and need to be converted to [0, 255]. Hex conversion methods return web-formatted strings like #aabbcc, so they’d need to be converted to integers in ABGR, 0xffccbbaa.

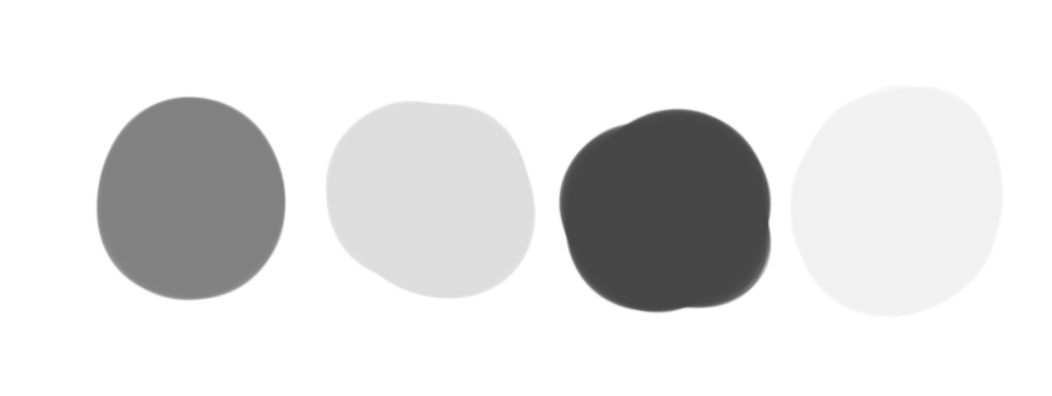
In the trial run, I assumed that hue was the major axis, lightness the minor axis and saturation a fixed constant set by the user. Hue and lightness could be rotated / transposed, depending on how a user wanted to cycle through with the [ and ] keys. Or saturation could be swapped in as one of the axes.

uniformity

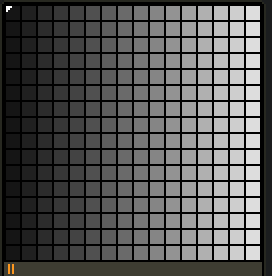
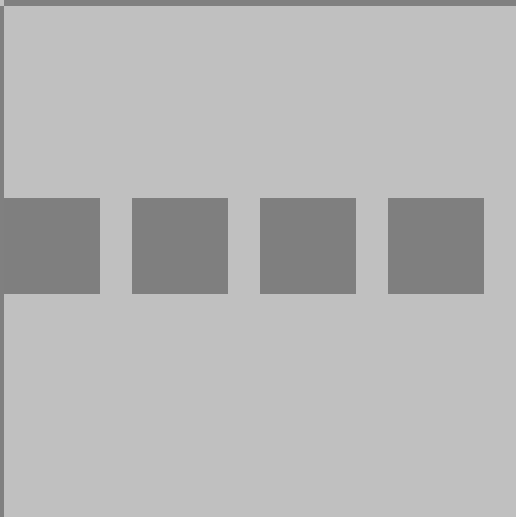
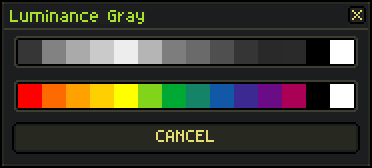
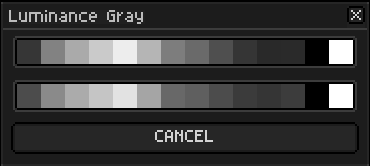
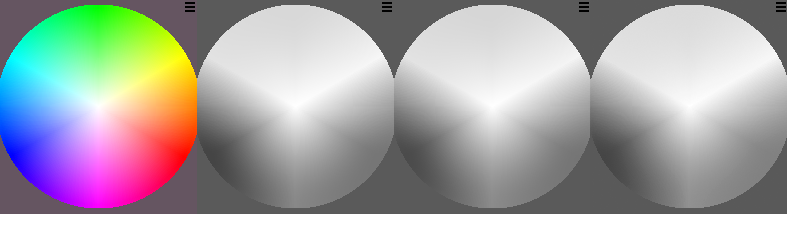
And here’s what a palette looks like when you crank the saturation down to zero. :slight_smile: It’s the opposite, I think, of where this discussion started, but also useful.

1 Like

cool! i completely overlooked “implementations” in the menu :smiley: well, it was late at night…

yes, i agree it is very useful to have this kind of palette generator which deals with issue of inconsistent brightness across hues!

this became way too complex here, i dont know if i need to remark this in a different category at this point?
also whats the language aseprite is coded in after all.

yeah, just a little bit, but helpful progress has been made!
well, maybe it should go to “features” as technically greyscale conversion works as intended, it’s just we would like to see it done differently + there’s that remake of colour wheel in greyscale you asked for (personally i’d love to see not only that but complete overhaul of colour wheel)

judging by .cpp file extension i’d say aseprite is written in c++

1 Like

changed as asked

Might be very late on this, but, I’d love to see grayscale with luminescence on the color picker as well, currently I have to do (Sprite > Color Mode > Grayscale > check color value > ctrl + z > adjust color > repeat) if I wanted to be very pedantic with my color values

1 Like